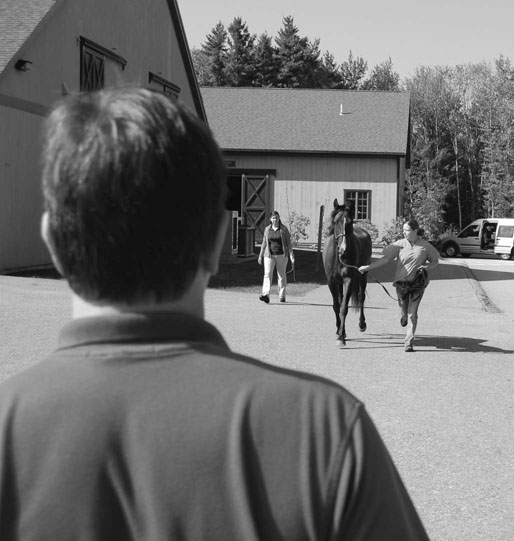
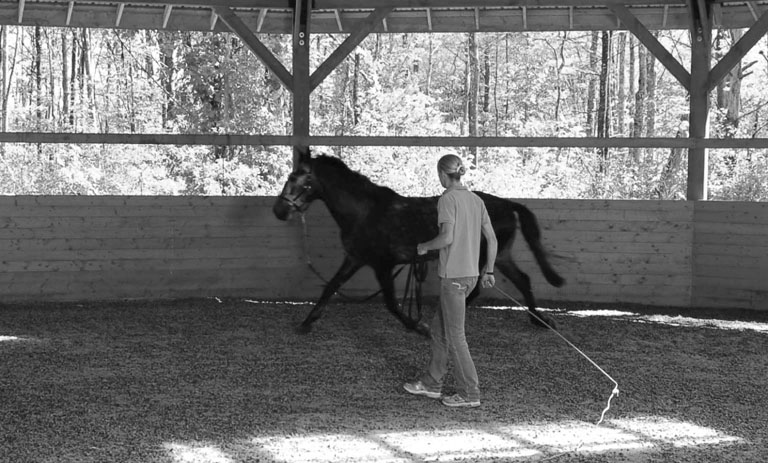
Lameness evaluation steps are as follows: Experience in observing and interpreting the equine gait is a hard fought and ongoing process. The science of gait evaluations (see Chapters 10 and 12) may help us understand how and why a horse moves in a particular fashion, but visualization by a trained and experienced examiner remains the basis for most lameness examinations. Specific questions to ask during the history include: 1. When was the lameness first noticed and how long has it been present? 2. Describe what was initially noticed. 3. Under what circumstances is the lameness most obvious? 4. Have any swellings or thickenings been observed? 5. Has the horse undergone any treatment for this condition? For example, has the horse had rest, medication, change in level of use, or shoeing modifications. 6. When was the horse last shod or trimmed? 7. Is there any previous history of lameness? Is this a new condition or a continuation of a previous injury? Tendons and ligaments should be palpated with the limb in both weight bearing and flexed positions. Tendon sheath effusions are best evaluated with the limb bearing weight. When the limb is flexed the tendons and ligaments on the palmar or plantar surface are more easily defined and separated. Deep palpation of the mid- to proximal suspensory ligament often elicits some discomfort in the normal horse. Compare contralateral limbs if there is a concern regarding palpation sensitivity.1 Examination of the lame horse in motion is necessary to characterize the nature and intensity of the gait abnormality. The lameness should be graded using a consistent scale (Table 13.1).2 Conducting the in motion examination in controlled surroundings will add consistency to the findings. The ideal location to examine a horse for lameness is a flat, firm surface where the horse may by jogged for 30 to 40 meters without encountering obstructions or distractions.3 An asphalt surface has the advantage of allowing the examiner to both visualize and listen to the horse’s footfalls. The sound of the lame limb impacting the surface will be diminished when compared to the unaffected contralateral limb. A common finding with subtle gait abnormalities may be the unaffected limb of a pair impacting the surface louder than the affected limb. Gait symmetry and footfalls are best evaluated at the walk and trot with the observer sighting along the longitudinal axis of the horse as it moves away and returns (Fig. 13.1). Table 13.1 A safe place to work the horse in a circle, preferably on a longe line, should be available (Fig. 13.2). The surface may be firm or on soft footing, but safe enough to permit circles from 10 to 20 meters in diameter without risk of the horse slipping. Horses with subtle gait abnormalities may need to be observed while being worked in normal tack. In select circumstances an examiner with sufficient experience may find it useful to work or ride the horse. This is particularly useful in harness racehorses that only demonstrate their gait abnormalities at speed. Watch the horse initially at a walk to evaluate footfall patterns and to familiarize the horse with the environment in which the examination will take place. Each foot should normally land heel first, then toe with the lateral and medial aspects of the hoof landing nearly equally in time.4 Deviations from normal footfall may indicate dynamic imbalance of the limb that could be due to abnormalities of conformation, hoof shape, shoeing or due to pain. The swinging phase of the limb in a correctly conformed horse should be a straight track without any predilection to swinging-in or -out. Toe-in or toe-out conformations predispose the horse to swinging-out (‘paddling’) or swinging-in (‘winging-in’), respectively.3 The trot is the most useful gait to evaluate lameness because it is a symmetrical, two-beat gait where diagonal limb pairs are simultaneously in the stance phase. The horse should be trotted at a comfortable, unhurried speed with the head allowed to move freely up and down. Subtle imbalances in gait may easily be missed if the examiner is not directly aligned with the center of the long axis of the horse (the vertebral column). The examiner should also observe the horse from the side as it trots by for characteristics of stride length and to determine if there is any toe dragging. Viewing the horse from the side at the trot may provide better evaluation of rear limb lameness.5 Lameness is evident to the observer as an asymmetry of the gait. Forelimb lameness is usually evident as a head bob: the head rises immediately prior to and during weight bearing of the lame limb. Conversely, the head drops as the sound limb contacts the ground and bears weight.6 Stride length may also be altered by gait abnormalities. A shortened anterior phase to the stride (shuffling gait) may be associated with heel pain as the horse is reluctant to extend the affected limb and bear full weight on the heel.3 This type of change in the stride may also occur due to pain during the swing phase of the gait, such as may be encountered with bicipital bursitis/tendonitis of the forelimb. Subtle forelimb lameness may only be evident as an unequal shift in weight with the unaffected limb bearing more weight than the lame limb. Such subtle weight shifts are best observed with the horse trotting directly toward the examiner. Rear limb gait abnormalities may be evident as elevation of the hip (hip hike, gluteal rise), dropping of the hip (hip drop, gluteal drop), toe dragging and decreased stride length.3 These responses to rear limb lameness are mechanisms the horse uses to avoid discomfort during various portions of the stride and are due to the nature of the abnormality. Elevation of the hip occurs when the horse shifts weight away from the lame limb during the weight bearing phase of the stride. Dropping of the hip occurs if pain is most acute during the posterior phase of the weight bearing portion of the stride. Often this movement is associated with abnormalities of the caudal/plantar aspect of the rear limb such as: suspensory desmitis, flexor tendonitis, desmitis of the distal suspensory apparatus, and injury to the semimembranosus/semitendinosus muscle group. Dragging of the toe is associated with reluctance to raise the limb during the swing phase of the stride and is usually associated with upper rear limb joint lameness such as bone spavin and abnormalities of the stifle or coxofemoral joints. Stashak describes ‘gluteal rise and use’ as characteristics observed from the rear of the horse at the trot. Gluteal rise is observed during the swing phase of the stride and use is observed during weight bearing.3 Three characteristics of rear limb lameness in relationship to the gluteals were described: 1. depressed gluteal rise and use is associated with upper rear limb (usually hip region) lameness, 2. symmetric gluteal rise, but decreased gluteal use, is seen in subtle rear limb lameness and is non-localizing, and 3. rapid increased gluteal rise with decreased gluteal use is found in horses with marked discomfort during weight bearing and is often associated with a noticeable head bob.3 During the trot, the pelvis normally rocks symmetrically from left to right in the sound horse when observed from the rear. In a study of induced right distal tarsal lameness, the right limb had greater vertical displacement of the tuber coxae than did the left (unaffected) limb, but the difference was not significant.5 However, the ratio of left to right tuber coxae vertical displacement decreased 20% with the induction of distal tarsal lameness.5 The change in ratio was evidence that tuber coxae asymmetric movement is a sensitive indicator of rear limb lameness at the trot.5 A practical application of these findings is: when a rear limb lameness is observed at the trot from the rear of the horse, the tuber coxae of the lame limb usually has greater up-and-down motion compared to the tuber coxae of the sound limb. Severe rear limb lameness (>grade 3) is often associated with a head bob. At the trot the rear limb and the contralateral forelimb are simultaneously in the same stride phase (working as a diagonal pair). If lameness of the rear limb is severe enough, as the affected limb contacts the ground the horse will shift weight forward (off of the lame rear limb) using his neck – resulting in an observable head drop as the contralateral forelimb enters the weight bearing phase of the stride. Kinematic analysis has found a measurable head bob with even mild rear limb lameness.7 The examiner needs to be aware of this process as moderate to severe rear limb lameness may be confused with a lameness of the ipsilateral forelimb.3,7 Manipulations that enhance or localize lameness include: Most sport horses may be safely worked in a circle on a longe (lunge) line. Working the horse in a 10 to 20 meter diameter circle will put additional weight and stress on the innermost limbs and the medial aspect of the outermost limbs (Fig 13.2). The additional stress on the limbs helps the examiner identify subtle lamenesses and in some cases will help localize the region of soreness to a portion of the limb. A round pen of appropriate size may be similarly used. Flexion tests are used to apply stress or pressure on an anatomical region of the limb for a set period of time. Following the flexion period the horse is trotted off and observed for the effects of the test on gait. Recalling the baseline level of lameness during both trotting on the lead rope and on the longe line (if appropriate) is crucial to objectively evaluating the results of both flexion tests and diagnostic local anesthesia. The amount and duration of pressure applied may affect the outcome of flexion tests.8 Consistency of application is also a key to correct interpretation of flexion tests. The flexion test, particularly of the distal limb, should not be over interpreted. More than 60 of 100 horses determined to be sound prior to application of manipulative tests had some degree of lameness evident after distal limb flexion.9 Each flexion test should be completed in anatomical pairs (for example: distal flexions of both fore limbs) with the sound limb flexed first. Tests should progress from the distal to proximal aspect of the limbs. Moderate and equal pressure should be applied for each flexion test. Consistency is improved by having the same individual perform all of the tests during an examination. One study found a 12% coefficient of variation between multiple distal forelimb flexion tests applied by one clinician and a 20% coefficient of variation between different clinicians.10 Flexion tests used for lameness evaluation are described in Table 13.2 and figures that demonstrate various manipulations are included (Fig. 13.3, Fig. 13.4, Fig. 13.5 and Fig.13.6). Results of flexion tests may be recorded as: negative: no change in lameness, slight positive: slight exacerbation of lameness following flexion that is noticed during only a portion of the trotting course, moderate positive: lameness is exacerbated while the horse is trotting away from the examiner, but not on the return and severe positive: marked exacerbation of lameness during the outbound and return portions of the trotting course. Table 13.2 Manipulative tests for lameness evaluation
Diagnosis of lameness
Introduction
History
Visual examination at rest
In motion examination
GRADE
LAMENESS GRADING SCALE (AFTER AMERICAN ASSOCIATION OF EQUINE PRACTITIONERS SCALE2)
0
Lameness is not observed
1
Intermittent or inconsistent lameness at the trot that is difficult to discern under any circumstance
2
Lameness is difficult to observe at a walk or trot in a straight line, but is consistently apparent under special circumstances such as with manipulation longeing, or riding
3
Lameness is consistently observed at the trot under all conditions
4
Lameness is obvious with marked asymmetry of gait at the trot without manipulation.
5
Minimal or no weight bearing on the affected limb, horse is reluctant to move
Manipulative tests and techniques
Longe line
Flexion tests
SEQUENCE OF FLEXION TESTS
TECHNIQUE
DURATION OF TEST
FORELIMB:
Distal limb
Stand to the front or side of the horse with the carpus relaxed. Grasp the toe with one hand using the other hand placed on the palmar aspect of the distal metacarpus as a fulcrum (Fig. 13.3A). Alternatively, stand in front of the horse and grasp the toe with both hands placing the dorsal aspect of the fetlock on your knees and flex the distal joints (Fig. 13.3B). Distal limb flexion stresses the metacarpophalangeal, proximal interphalangeal, and distal interphalangeal joints and the navicular region.
30 seconds
Carpus
Stand to the side of the horse, grasp the distal dorsal aspect of the metacarpus with one hand. Flex the carpus maximally. A full range of motion is evident when the palmar metacarpus contacts the caudal aspect of the antebrachium. The metacarpus may be adducted and abducted during flexion to provide more stress to the medial and lateral aspects of the joints.
30 seconds
Metacarpus
Direct pressure on the flexor tendons or suspensory ligament
30 seconds
Proximal forelimb
The shoulder and elbow are difficult to isolate. The bicipital bursa of the shoulder may be evaluated by applying direct pressure over the bicipital tendon at the point of the shoulder or by retracting the upper fore limb caudally to its full extent. The upper limb should be abducted and adducted to stress the medial and lateral support structures of the joints.
30–60 seconds
REAR LIMB:
Distal rear limb
Techniques are similar to that used in the forelimb. Flexion is performed with the tarsus and stifle relaxed. See Figs. 13.4 A and B for two techniques.
30 seconds
Full rear limb
Also referred to as the ‘spavin test’. This flexion test stresses all of the rear limb joints to some degree because of their connection via the reciprocal apparatus, however the tarsus and stifle joints are stressed more than others. The rear limb is grasped with both hands around the distal metatarsus and the full limb is flexed maximally (Fig. 13.5).
45 seconds
Stifle
![]()
Stay updated, free articles. Join our Telegram channel

Full access? Get Clinical Tree

 Get Clinical Tree app for offline access
