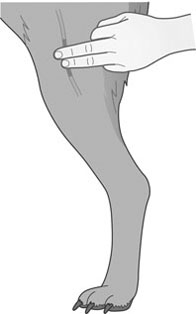
Mercury or digital thermometer. Table 2.1 Normal clinical parameters in the dog and cat 1. Action: Place the animal in a comfortable standing position on a table. Rationale: If the patient feels uncomfortable or insecure it will try to escape. 2. Action: Ask an assistant to restrain the dog gently by placing one arm around the neck and the other around the chest. Ensure that the dog is relaxed and quiet. Cats should be held lightly with both hands around the shoulders, or place one hand under the chin and the other around its chest, pulling it close to your body. 3. Action: Select either a mercury or digital thermometer. Rationale: Choice of instrument depends on availability. 4. Action: Lubricate the end with K-Y jelly or a similar lubricant. Rationale: Lubrication reduces the discomfort of insertion into the rectum. 5. Action: Shake the mercury down to the bulb or check that the digital thermometer is switched on and displaying a reading. Rationale: If the mercury is not shaken down the new reading will be inaccurate. 6. Action: Gently, but firmly, insert the instrument into the rectum through the anus. A slight rotating action may help entrance through the rectal sphincters. Cats, particularly, may require patient gentle pressure before the sphincters relax. 7. Action: Leave the thermometer in position for at least 30 seconds. Rationale: The mercury has to have time to warm up and expand. 8. Action: Clean the end of the thermometer by wiping with a paper cloth or cotton wool. 9. Action: Read the mercury thermometer by looking for the line of mercury against the scale. Read off the figures on the digital thermometer. Rationale: The glass of the thermometer magnifies the mercury line and makes it easier to read. 10. Action: Record the reading on the hospital record or clinical record. Rationale: To monitor rises or falls in the body temperature. 11. Action: Shake down the mercury or reset the digital reading. Rationale: To prepare the thermometer for use in the future. 12. Action: Place the bulb of the instrument in the disinfectant container. 1. Action: Place the animal in a comfortable standing position on a table. Rationale: If the patient feels uncomfortable or insecure it will try to escape. 2. Action: Ask an assistant to restrain the dog gently by placing one arm around the neck and the other around the chest. Ensure that the dog is relaxed and quiet. Cats should be held lightly with both hands around the shoulders, or place one hand under the chin and the other around its chest, pulling it close to your body. 3. Action: Standing on one side of the animal, place the fingers of one hand on the medial aspect of the thigh. Locate the femoral artery as it runs down the medial aspect of the femur (Fig. 2.1). 4. Action: Press gently against the artery with the second and third fingers and feel the pulse. 5. Action: Count the beats of the pulse for 60 seconds. Rationale: 60 seconds is enough time in which to detect any abnormalities. 6. Action: Record the pulse rate. Rationale: If there are any irregularities in rate and rhythm, inform the veterinary surgeon. 1. Action: Place the animal in a comfortable standing position on a table. Rationale: If the animal is quiet and comfortable the heart can be heard more easily. 2. Action: Ask an assistant to restrain the dog gently by placing one arm around the neck and the other around the chest. Ensure that the dog is relaxed and quiet. Cats should be held lightly with both hands around the shoulders, or place one hand under the chin and the other around its chest, pulling it close to your body. 3. Action: Place the earpieces of the stethoscope in your ears and place the stethoscope head on the lower left chest caudal to and just dorsal to the elbow – between the third and sixth ribs. Rationale: This is close to the left ventricle where the heart beat can be best heard. 4. Action: Listen to the rhythm of the heart and count the heart beats for 60 seconds. Rationale: 60 seconds is enough time in which to detect any abnormalities. 5. Action: Record the pulse rate. Rationale: If there are any irregularities in rate or rhythm, inform the veterinary surgeon. 1. Action: This method is best used for narrow-chested breeds of dog, such as whippets, greyhounds or lurchers and most cats. Rationale: The hand will reach across the sternum more easily in such animals. 2. Action: Place the animal in a comfortable standing position on a table. Rationale: If the animal is quiet and comfortable the heart can be heard more easily. 3. Action: Ask an assistant to restrain the dog gently by placing one arm around the neck and the other around the chest. Ensure that the dog is relaxed and quiet. Cats should be held lightly with both hands around the shoulders, or place one hand under the chin and the other around its chest, pulling it close to your body. 4. Action: Either put the flat of the hand on the lower left chest caudal to and just dorsal to the elbow or stretch the hand across to the other side over the sternum and feel the heart beating. Rationale: To feel the heart beating within the chest. 5. Action: Count the beats over 60 seconds. Rationale: 60 seconds is enough time in which to count the rate. 6. Action: Record the pulse rate. Rationale: If there are any irregularities in rate or rhythm, inform the veterinary surgeon. 1. Action: The patient is anaesthetized with a cuffed endotracheal tube in place. 2. Action: Select the correct diameter of oesophageal stethoscope. Rationale: Small dogs require a smaller bore of tube than larger dogs. 3. Action: Lay the stethoscope tube on the outside of the dog or cat and measure the approximate length from the mouth to the heart. Mark the tube with a pen or adhesive bandage at the mouth end. Rationale: This ensures that the tube is best placed to hear the heart when inside the oesophagus. 4. Action: Lubricate the end of the stethoscope with K-Y jelly and introduce it through the patient’s mouth and into the oesophagus using gentle pressure. Push it in up to the pre-marked part of the tube. 5. Action: Insert the earpieces of the stethoscope into your ears and listen to the rhythm of the heart. Rationale: If there are any irregularities in rate or rhythm, inform the veterinary surgeon. 6. Action: Count the heart beats for 60 seconds. Rationale: 60 seconds is enough time in which to count the rate and detect any abnormalities. 7. Action: Record the pulse rate on the patient’s anaesthetic chart. 1. Action: Place the animal in a comfortable standing position on a table. Rationale: If the patient feels uncomfortable or insecure it will try to escape. 2. Action: Observe the movement of the rib cage. Rationale: The chest expands and contracts once with each breath. 3. Action: Count the number of breaths taken over 60 seconds. Rationale: 60 seconds is enough time to obtain an accurate measurement of the rate. 4. Action: Record the respiration rate on the patient’s hospital chart or clinical case record. Rationale: To produce a permanent record of any changes, which may indicate a need for treatment. 1. Action: Place the animal in a comfortable standing position on a table. Rationale: If the patient feels uncomfortable or insecure it will try to escape. 2. Action: Place the earpieces of the stethoscope in your ears and place the diaphragm of the stethoscope on the upper half of the chest just caudal to the scapula. 3. Action: Count the breaths taken over 60 seconds. Rationale: 60 seconds is enough time to obtain an accurate measurement of the rate. 4. Action: Record the respiration rate on the patient’s hospital chart or clinical case record. Rationale: To produce a permanent record of any changes, which may indicate a need for treatment.
Measuring clinical parameters
INTRODUCTION
Procedure: To measure the body temperature (Table 2.1)
Equipment
Clinical parameter
Dog
Cat
Body temperature
38.3–38.7 °C
38.0–38.5 °C
Pulse rate
60–180 beats/min
110–180 beats/min
Respiratory rate
10–30 breaths/min
20–30 breaths/min
Capillary refill time
1–2 seconds
1–2 seconds
Oxygen saturation
Close to 99%
Close to 99%
Arterial blood pressure: systolic/diastolic
Puppy: 108/60 mmHg
Kitten: 123/63 mmHg
Adult: 141/81 mmHg
Adult: 129/70 mmHg
Central venous pressure
3–7 cm H2O
3–7 cm H2O
Carbon dioxide concentration
End-tidal: 35–54 mmHg
End-tidal: 32–35 mmHg
Inspired: less than 8 mmHg
Inspired: less than 8 mmHg
Volume of urine produced
1–2 ml/kg bodyweight/hour
1–2 ml/kg bodyweight/hour
Volume of tears produced
15–25 ml/min when measured using Schirmer strips
15–25 ml/min when measured using Schirmer strips
Intraocular pressure
25 mmHg
25 mmHg
Procedure: To measure the pulse rate by palpation of the femoral artery (Table 2.1)
Procedure: To measure the pulse rate using a stethoscope (Table 2.1)
Procedure: To measure the pulse rate by palpation of the chest (Table 2.1)
Procedure: To measure the pulse rate using an oesophageal stethoscope (Table 2.1)
Procedure: To measure the respiratory rate by direct observation (Table 2.1)
Procedure: To measure the respiratory rate using a stethoscope (Table 2.1)
![]()
Stay updated, free articles. Join our Telegram channel

Full access? Get Clinical Tree


