3 Dental Instruments and Equipment
When you have completed this chapter, you will be able to:
• List the hand instruments used in veterinary dentistry and describe the structure and purpose of each.
• Describe the materials used for sharpening hand dental instruments and explain the technique used to sharpen hand dental instruments.
• Explain the principle utilized by the ultrasonic scaler and differentiate between magnetostrictive and piezoelectric devices.
• Differentiate between sonic and rotary scalers.
• Differentiate between electric-powered and air-powered dental polishing units.
• Discuss the types of air compressor systems used in veterinary dentistry and describe care of the systems.
• Differentiate between the uses and care of low-speed and high-speed handpieces.
• List and describe the types and uses of burs available for low-speed handpieces.
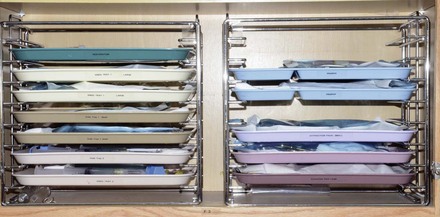
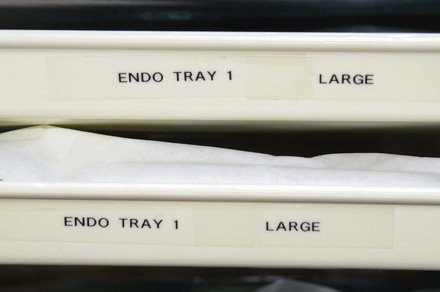
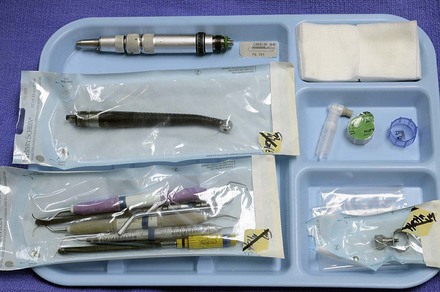
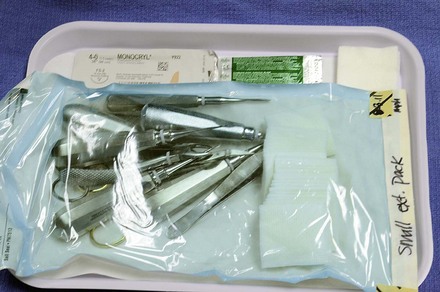
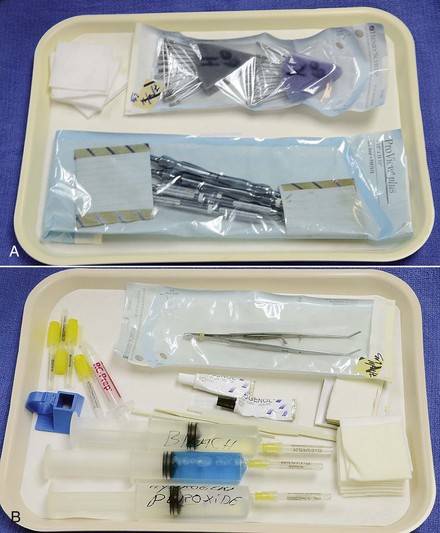
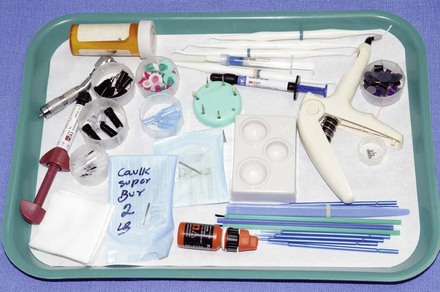
Organization of the Dental Department
Organizing the dental equipment into trays that can be pulled from the shelf as needed is a very efficient method of organizing dental equipment (Figures 3-1 through 3-6).
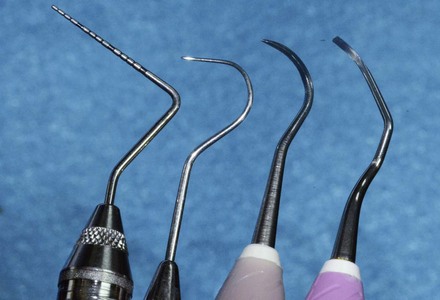
Hand Instruments
Veterinary technicians and practitioners use four main types of hand instruments (Figure 3-7). Most instruments have four specific parts: handle, shank, terminal shank, and working end. Handles, the parts that are grasped, come in a variety of round, tapered, and hexagonal shapes. The best handle shape for the procedure depends on individual preference. The shank joins the working end with the handle. The length and curvature of the shank determines the teeth that the instrument will be able to access. The terminal shank is the part of the shank that is closest to the working end. The working end of the instrument is the portion that comes in contact with the tooth.
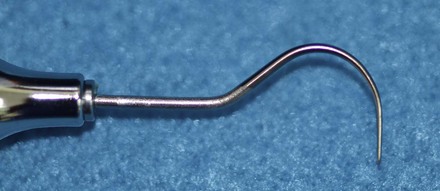
Explorers
Shepherd’s hook
The shepherd’s hook (or crook) is the most commonly found explorer. These instruments are manufactured in combination with the periodontal probe (Figure 3-8).
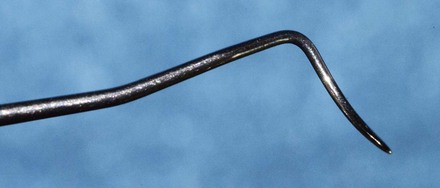
Pigtail explorer
The curved shape of the pigtail explorer allows the operator to use the tip of the instrument and thereby avoid touching with the side of the instruments those parts of the tooth that are not being explored (Figure 3-9). Pigtail explorers usually come hooked to the right on one end and to the left on the other, allowing for a greater range of exploration. The explorer functions by gliding along the tooth surface in search of irregularities and magnifies the user’s tactile sense.
Periodontal Probes
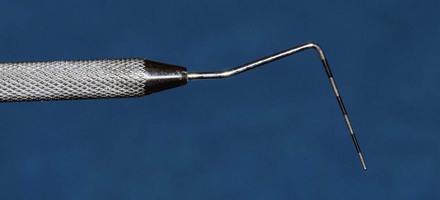
Many styles of periodontal probes are available (Figure 3-10). The notched periodontal probe has three major notches at 5, 10, and 15 mm. There are intermediate notches at 1, 2, 3 (skip 4), 6, 7, 8 (skip 9), 11, 12, and 13 (skip 14) mm.
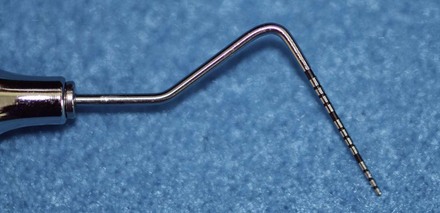
Periodontal probes with bands are available in 18-mm lengths. Each band represents 3 mm (Figure 3-11).
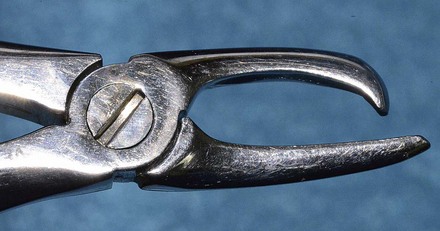
Calculus Removal Forceps
The calculus removal forceps allow for quick removal of large pieces of calculus (Figure 3-12). The instrument has tips of different lengths and shapes. The longer tip is placed over the crown, and the shorter tip is placed under the calculus. Calculus is sheared off the tooth when the two parts of the handle are brought together. When using this instrument, the technician or practitioner must be careful not to damage the enamel surface or gingiva.
Scalers
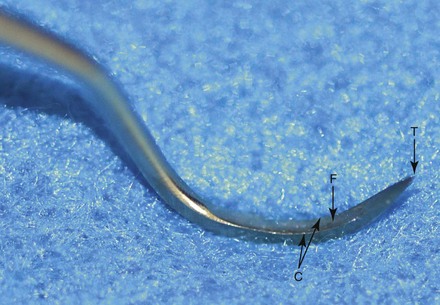
Scalers have a sharp point, or a tip (T). The face (F) is the flat side of the instrument between the two cutting edges. The cutting edge (C), the working portion of the scaler, is the confluence of the face and the sides (Figure 3-13). To be effective, scalers must be sharpened regularly.
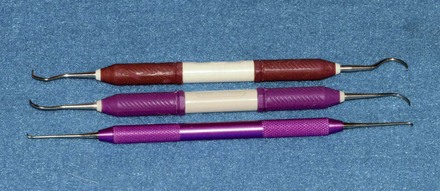
Several types of scalers exist (Figure 3-14). The scaler in the middle of Figure 3-14, generally called a sickle scaler, is most commonly used. The ends of this scaler are mirror images of each other. Depending on the manufacturer, sickle scalers are denoted H6/7, S6/7, or N6/7. The scaler at the top of Figure 3-14 has a sickle scaler on one end and a 33 on the other. The instrument on the bottom of Figure 3-14 is a fine scaler for extremely small teeth. It is known as a Morris 0-00.
Curettes
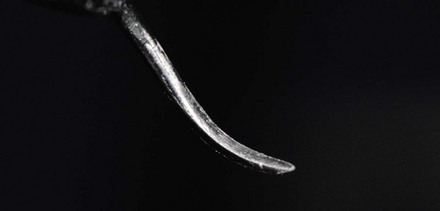
The point of the curette, called the toe (T), is rounded. The face (F) of the curette is the concave side. The cutting edge (C) is the confluence of the sides and the face. Curettes have a round back (Figure 3-15).

Curette and Scaler Care
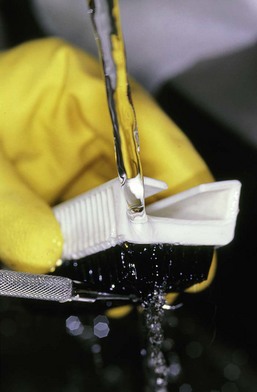
The best practice is to sharpen each instrument after cleaning and disinfecting and before every use. Heavy-duty industrial gloves should be used while cleaning instruments (Figure 3-16). Alternatively, ultrasonic instrument cleaners may be used. Ideally, the operator should have several instrument packs so that the instruments can be cleaned, sharpened, and sterilized between uses. Sterilization reduces the risks of cross-infection among patients and from patients to staff members (e.g., if staff members accidentally injure themselves with the instrument). Disinfecting a stainless steel table before placing an animal on it makes little sense if the instrument itself is unclean.
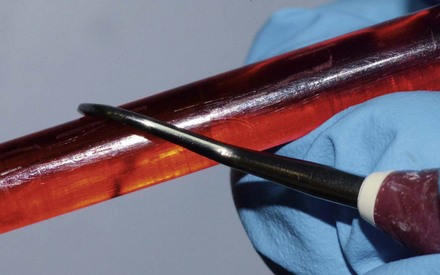
Testing for sharpness
Visual inspection
All that is needed to perform a visual inspection is a bright light and sharp eye. The instrument is held and rotated toward the light source (Figure 3-17). If the instrument is dull, the edge is rounded and reflects light. If the instrument is sharp, the edge does not reflect light.
Sharpening stick
A sharpening stick is an acrylic or plastic rod (Figure 3-18). A syringe casing may also be used to check for sharpness. To test, the edge of the instrument is drawn across the rod. A dull blade glides over the surface without catching at it. Conversely, a sharp blade easily catches as the instrument is drawn against the surface of the sharpening stick.
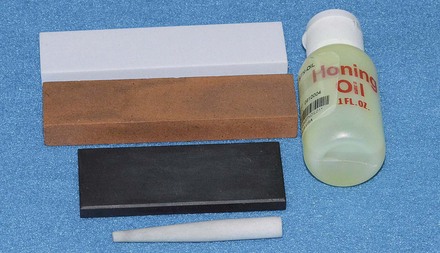
Sharpening equipment
Flat stone
Several types of stones are available for sharpening (Figure 3-19). The Arkansas stone is used for final sharpening of an instrument that is already close to sharpness. An India stone is used for “coarse” sharpening of an overly dull instrument or for changing the plane of one or more of the sides of the instrument. Sharpening with the India stone is followed by the use of an Arkansas stone. Both the Arkansas and the India stones require oil for effective use. The ceramic stone may also be used for fine sharpening. With ceramic stones, water is generally used as the sharpening medium instead of oil. A conical stone is a round Arkansas stone. It is used to provide a final sharpening to the instrument by working on its face.
Stay updated, free articles. Join our Telegram channel

Full access? Get Clinical Tree


