CHAPTER 1 Introduction
When properly applied, cytologic examination can be an extremely powerful diagnostic aid.1–11 Generally, cytologic samples can be collected quickly, easily, and inexpensively, with little or no risk to the patient. The cytologic interpretation often is valuable in establishing a diagnosis, identifying the disease process (neoplasia vs inflammation), directing therapy, forming a prognosis, and/or determining what diagnostic procedure should be performed next. Frequently, the samples can be prepared, stained, and interpreted while the client waits in the examination room. This allows other diagnostic procedures to be performed or therapy to be altered based on cytologic findings at the initial visit. As a result, the patient receives better and/or more expeditious care, and the client is more satisfied.
Risk vs. Value
The accuracy of cytologic examination as a diagnostic tool has been studied and reviewed in human and veterinary literature.5,12–17 Most studies have compared cytologic results to histopathologic results and/or biologic behavior of the lesion. Some studies indicate that properly performed fine-needle aspiration biopsy (FNAB) is more accurate than conventional core needle biopsy or fine-aspirate core biopsy.12,13,16 FNAB also poses very little risk to the patient. Complications subsequent to FNAB of abdominal organs (eg, liver, spleen, pancreas, prostate) or abdominal masses are much less than those expected for conventional core biopsy techniques.17,19 In a study of 11,700 human patients, Livraghi et al concluded that some serious complications (peritonitis through the crossing of the digestive tract, fistula formation, bacteremia, tumor seeding), theoretically possible with FNABs, have either never occurred or occurred in such a tiny percentage of cases as to be regarded as negligible for practical purposes.19 Implantation of malignant cells along the aspiration tract and induction of hematologic metastasis subsequent to FNAB of malignant tumors are extremely rare and pose no practical danger to the patient, especially when the aspiration tract is removed during excision of the malignant tumor.12,14,19,20 However, some contraindications do exist and will be discussed in the relevant chapters.
Terminology
Hypertrophy refers to an increase in cell size and/or functional activity in response to a stimulus.
Metaplasia refers to a reversible process in which one mature cell type is replaced by another mature cell type. It often represents the adaptive replacement of cells sensitive to a stimulus by cells less sensitive to the stimulus. For example, chronic irritation of the ciliated columnar epithelial cells of the trachea and bronchi results in their focal or widespread replacement by stratified squamous epithelial cells.
Chromatin pattern refers to the microscopic appearance of the nuclear chromatin. In general, the chromatin pattern coarsens as malignant potential increases. Some commonly used terms for chromatin patterns are listed, briefly described, and schematically depicted in Table 1-1.
TABLE 1-1 Selected Chromatin Patterns
| Pattern | Description | Schematic |
|---|---|---|
| Smooth (sometimes referred to as a “fine” chromatin pattern | Finely etched, uniform pattern of thin chromatin strands; no aggregates of chromatin | 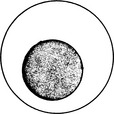 |
| Finely stippled | Smooth chromatin pattern with small discrete aggregates of chromatin scattered throughout nucleus | 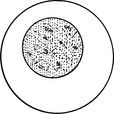 |
| Lacy (reticular) | Uniform pattern of medium-sized chromatin strands; no significant aggregates of chromatin; sometimes “reticular” used to imply pattern with slightly thicker chromatin strands than in lacy patterns |  |
| Coarse (ropy or cordlike) | Pattern of very thick chromatin strands | 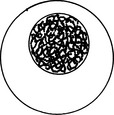 |
| Clumped | Large aggregates of chromatin scattered throughout nucleus; may occur with lacy or coarse chromatin patterns |  |
| Smudged | Chromatin pattern not discrete; outlines of chromatin strands and/or clumps vague; usual pattern for small lymphocytes | 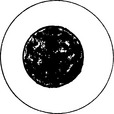 |
Collection and Smear Preparation
Scrapings
Scrapings can be collected from tissues during necropsy or surgery or from external lesions on the living animal. Scraping a lesion generally collects more cells than does imprinting or aspirating. However, scrapings are generally more painful to the animal than imprints and do not collect cells as deeply as do FNABs. As a result, scrapings from superficial lesions often only reflect a secondary bacterial infection and/or inflammation-induced tissue dysplasia. This hinders their use in diagnosis of neoplasia. Scrapings are prepared by holding a scalpel blade perpendicular to the lesion’s cleaned and blotted surface and pulling the blade toward oneself several times. The material collected on the blade is transferred to the middle of a glass microscope slide and spread by one or more of the techniques described for preparation of smears from aspirates of solid masses.
Aspiration of Masses
Aspiration Procedure: Hold the mass to be aspirated firmly; introduce the needle, with syringe attached, into the center of the mass; and apply strong negative pressure by withdrawing the plunger to about three-fourths the volume of the syringe (Fig. 1-1). Sample several areas of the mass. Take care not to aspirate the sample into the barrel of the syringe or to contaminate the sample by aspirating tissue surrounding the mass. Therefore, maintain negative pressure during redirection and movement of the needle only when the mass is large enough to allow the needle to be redirected and moved to several areas within it without danger of the needle leaving the mass. When the mass is too small for the needle to be moved without danger of it leaving the mass, relieve negative pressure during movement of the needle. Often, high-quality collections do not have aspirated material visible in the syringe and sometimes not even in the hub of the needle.
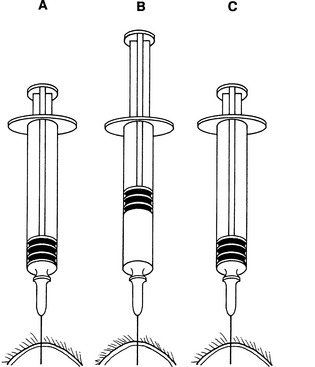
Fig. 1-1 Fine-needle aspiration from solid mass.
After needle is in mass (A), apply negative pressure to syringe by rapidly withdrawing plunger (B) one-half to three-fourths volume of syringe barrel. Redirect needle several times while maintaining negative pressure, if this can be accomplished without needle’s point leaving mass. Before removing needle from mass, release plunger, relieving negative pressure on syringe (C).
Nonaspiration Procedure (Capillary Technique, Stab Technique): A nonaspiration technique has been described for collection of cytology samples.21 This technique works well for most masses, especially in highly vascular tissues. The technique described here is a modification of the nonaspiration technique that is used at Oklahoma State University. This technique is similar to the standard fine-needle aspiration technique except that no negative pressure is applied during collection.
Preparation of Smears from Aspirates of Solid Masses
Combination Technique: One combination procedure involves spraying the aspirate onto the middle of a clean glass microscope slide (prep slide), which is held firmly on a flat, solid, horizontal surface. Place the edge of a second slide (spreader slide) onto the flat surface of the prep slide in front of the sample at a 45-degree angle to the prep slide and pull backward about one third of the way into the aspirate (Fig. 1-2). Slide the spreader slide forward smoothly and rapidly, as if making a blood smear. Next, place the flat surface of the spreader slide horizontally over the back third of the aspirate at a right angle to the prep slide. Allow the weight of the spreader slide (top slide) to spread the material, resisting the temptation to compress the slides. Keeping the spreader slide flat and horizontal, quickly and smoothly slide it across the prep slide.
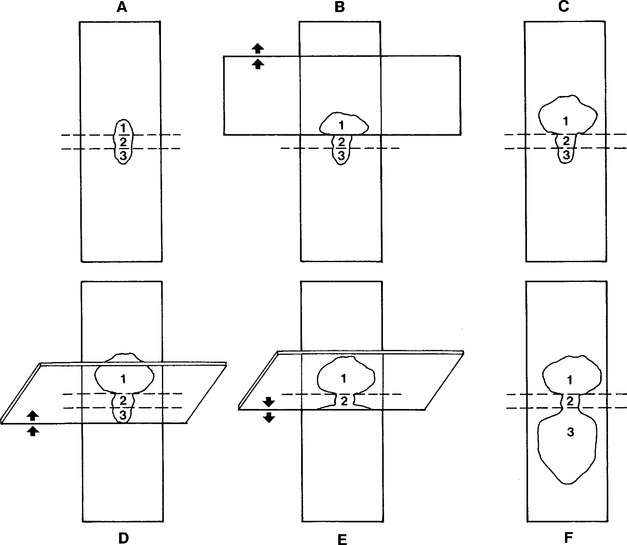
Fig. 1-2 Combination cytologic preparation.
A, Expel portion of aspiration onto glass microscope slide (prep slide). B, Place another glass microscope slide over about one third of preparation. Avoid excessive pressure. Slide spreader slide forward smoothly. C, This makes a squash preparation of about one third of aspirate (area 1). Spreader slide also contains a squash prep (not depicted). D and E, Slide edge of a tilted glass microscope slide (second spreader slide) backward from end opposite squash prep until it contacts about one third of expelled aspirate. Then slide second spreader slide rapidly and smoothly forward. F, This produces an area (3) that is spread with mechanical forces like those of blood smear preparation. Middle area (2) is left untouched and contains high concentration of cells.
Squash Preps: In expert hands, the squash prep technique can yield excellent cytologic smears. However, in less experienced hands, it often yields smears that are unreadable because too many cells are ruptured or the sample is not sufficiently spread. Make a squash prep by expelling the aspirate onto the middle of one slide and then placing a second slide over the aspirate horizontal with and at right angles to the first slide (Fig. 1-3). Quickly and smoothly slide the second slide across the first slide. A modification of the squash prep that has less tendency to rupture cells is to lay the second slide over the aspirate, then rotate the second slide 45 degrees and lift it upward (Fig. 1-4).
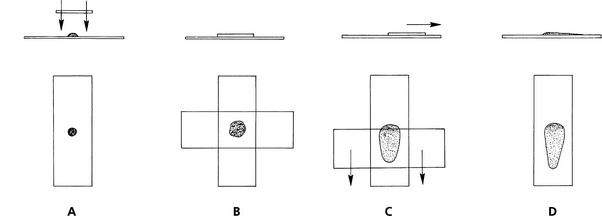
Fig. 1-3 Squash preparation.
A, Expel portion of aspirate onto glass microscope slide and place another slide over sample. B, This spreads sample. Take care not to place excessive pressure on slide, causing cells to rupture. C, Smoothly move slides apart. D, This usually produces well-spread smears but may result in excessive cell rupture.
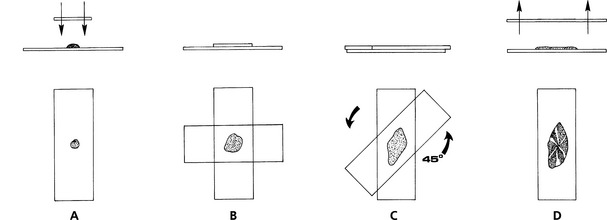
Fig. 1-4 Modification of squash preparation.
A, Expel portion of aspirate onto glass microscope slide and place another slide over sample. B, This spreads sample. Take care not to place excessive pressure on slide, causing cells to rupture. C, Rotate top slide about 45 degrees and lift directly upward, producing spread preparation with subtle ridges and valleys of cell (D).
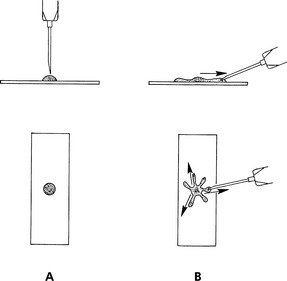
“Starfish” Preps: Another technique for spreading aspirates is to drag the aspirate peripherally in several directions with the point of a syringe needle, producing a starfish shape (Fig. 1-5). This technique tends not to damage fragile cells, but it allows a thick layer of tissue fluid to remain around the cells. Sometimes the thick layer of fluid prevents the cells from spreading well and interferes with evaluation of cell detail. Usually some acceptable areas are present, however.
Stay updated, free articles. Join our Telegram channel

Full access? Get Clinical Tree


