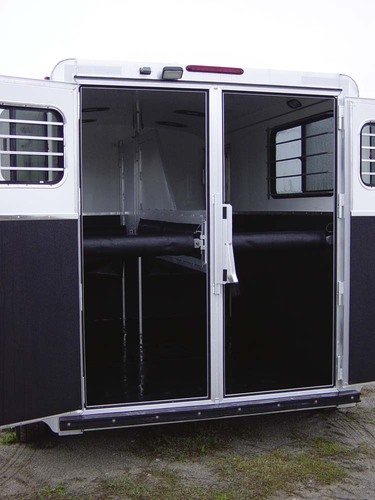
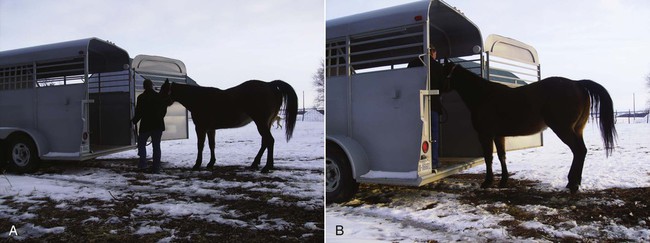
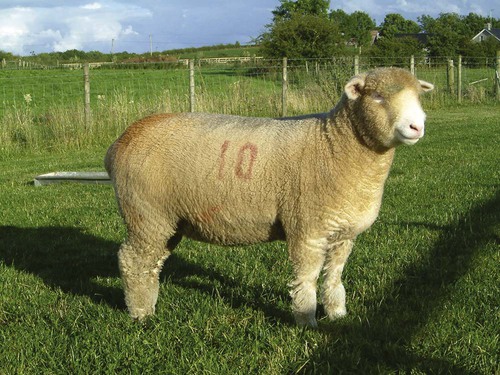
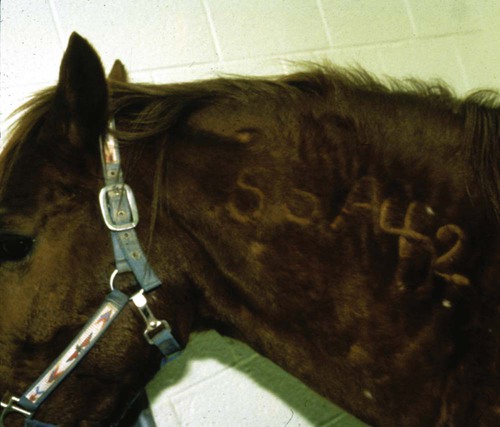
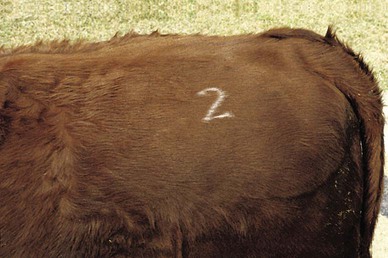
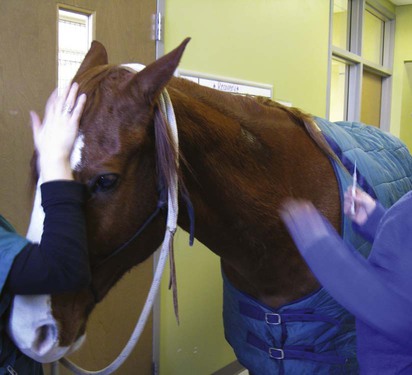
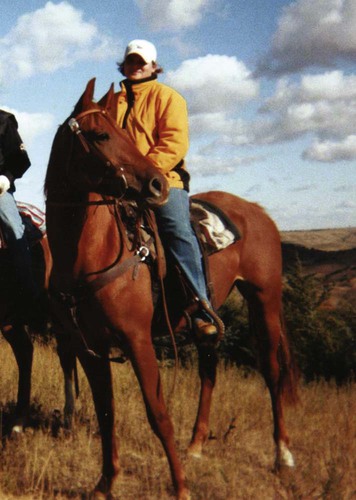
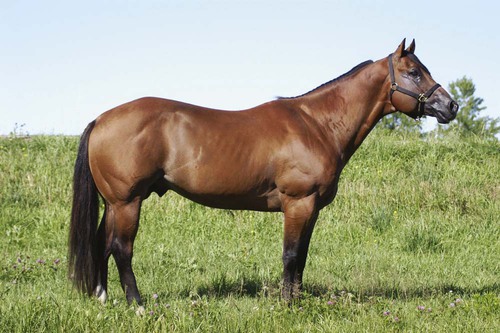
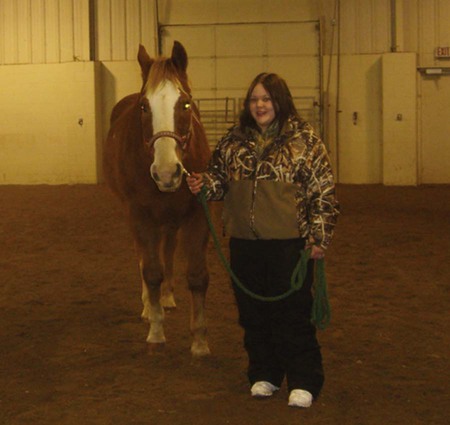
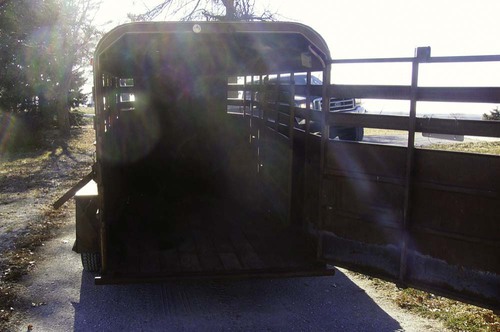
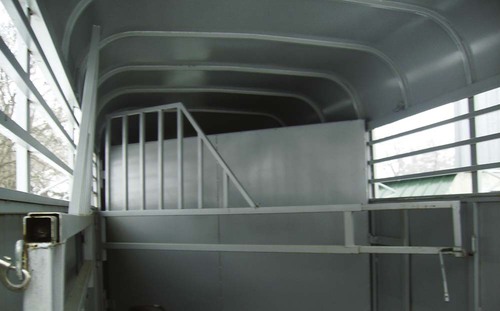
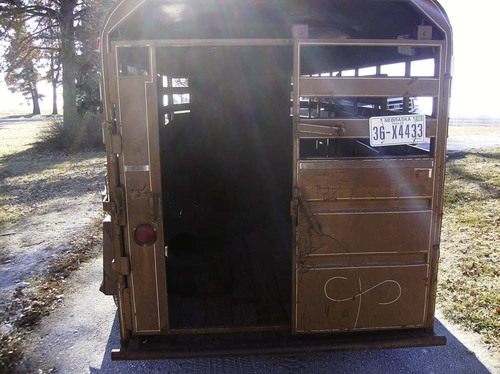
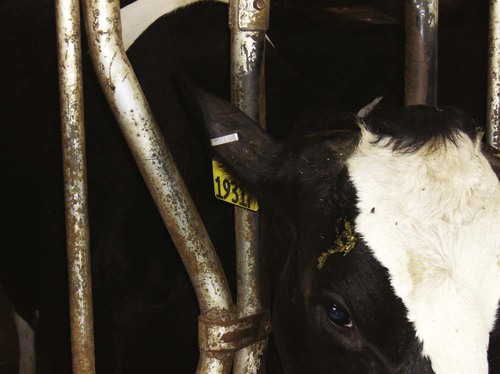
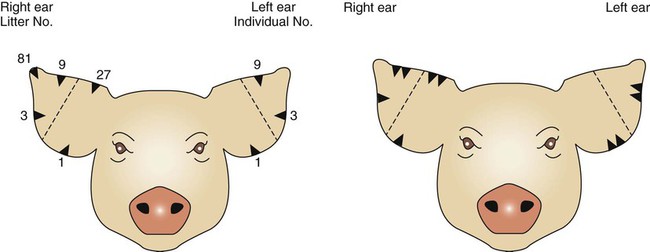
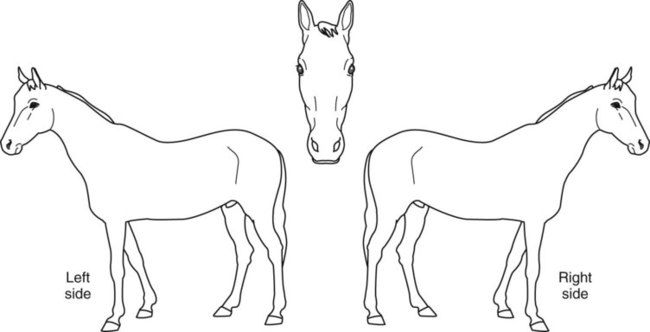
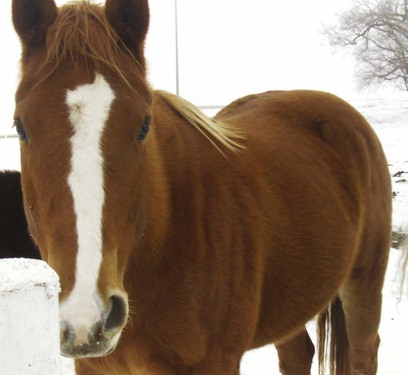
When you have completed this chapter, you will be able to • Explain the importance of identification in a veterinary practice • Effectively document identification for each species • Explain the importance of identifying the caretaker of the animal responsible for decisions • Explain the procedure for loading and unloading livestock and horses from trailers • Identify common medical records • Explain the importance of medical records • Perform a physical examination on any large animal species • Assist in a neurologic examination The two most common trailer designs into which horses are loaded are ramp trailers and step-up trailers (Fig. 5-1). Ramp trailers often have back doors that lower to the ground, doubling as a ramp. The horse is walked up the ramp into the trailer. Step-up trailers require the animal to step up into the trailer to load. With these types of trailers, horses are more likely to jump in or out of the trailer when loading or unloading. When loading a horse onto a trailer, you should remain calm (horses often sense fear in their handlers, most likely causing a more dangerous situation) and walk at the level of the poll (Fig. 5-2). Do not pause or hesitate when you reach the point at which the horse will have to step up or onto the ramp. Pausing or hesitating gives the horse a split second to think about what it is being asked to do. If you hesitate, continued attempts may be much more difficult. If the situation calls for redirection, never stop moving; keep forward movement and circle the horse back around to try again. If the horse is not going to load smoothly, the horse most likely will pull back on the lead rope once it is asked to step onto the ramp or into the trailer. Young horses or horses with a lack of training may pull back when they approach the trailer or even when they are inside the trailer. A horse that pulls back inside the trailer can cause a very dangerous situation because it may rear or lunge forward on top of the handler. To avoid this situation, never place yourself in front of the horse. You should always lead from the poll. Trailer layouts include two-horse trailers (Fig. 5-3), stock trailers, and slant-load trailers. A two-horse trailer will not allow you to enter the trailer with the horse. In this type of trailer, the animals have to enter themselves. You will need to lead the horse to the trailer with forward motion and then give slack in the lead rope to allow for entrance. Some horses are used to having the lead rope draped over the neck as they load onto the trailer. Once the animal is loaded, the gate on the back of the trailer should be calmly but quickly closed to prevent the horse from backing off the trailer. In a stock trailer, the horse will have a lot of room to move laterally inside the trailer. The horse is secured to a side wall once it is inside. In this type of trailer, the technician steps inside the trailer with the horse while loading and confidently leads it to the location where it will be tied and secured with trailer straps. Lead ropes are often used to secure horses inside trailers, though cross ties are the safest method for doing so. If a lead rope is used to secure the horse inside a trailer, it is important to tie it with a quick-release knot. When you are securing the horse inside a trailer, remember to leave no more than a foot and a half of slack in the rope. If the horse were to pull back after the rope is secured, the rope could trap the handler inside the trailer between the wall of the trailer and the rope, causing a dangerous situation. Horses should always be secured in a trailer with trailer ties or lead ropes if possible. The safety of the technician, owner, and veterinarian are the most important aspect of loading, and safety should always be considered first. If tying a horse in the trailer is determined to be too dangerous, you may have to leave the horse untied and free to move around throughout part of the trailer. Most of these types of trailers have partitions that separate the trailer into halves or thirds (Fig. 5-4); if used, the partition should be calmly but quickly closed to prevent escape of the horse. In a slant-load trailer (Fig. 5-5), the horse may be asked to load through a narrow area at the back of the trailer and then stand at an angle within the trailer. Once the horse is in the proper position, a partition is closed to allow another horse to be loaded beside it or to secure the animal from lateral movement during the ride. Extreme care should be taken when closing partitions in slant-load trailers because the handler often is in proximity of the animal’s hindlimbs. When unloading a horse from any of these trailers, the safest way to ask the horse to exit the trailer is to back it out of the trailer (Fig. 5-6). Extreme care should be taken when doing so because a horse often reacts by lunging forward when stepping off or onto the ramp. Always keep your eyes open and your attention on the horse. Horses that are allowed to walk off a trailer in a forward motion may often jump off trailers, with the potential for causing severe injury if they were to jump on the handler. When livestock are loaded onto trailers, there is still an element of danger associated with the procedure. However, gates and alleyways tend to make the job easier. The most important aspect to remember when loading livestock is their point of balance; if you are behind the animal, the animal will move forward. By providing a narrow alleyway and encouraging the animal to move forward from behind, the animal will most likely load uneventfully. The animal may hesitate when loading onto the trailer, but noise or a light tap with a paddle will usually encourage the animal to load. The most common problem that occurs when loading livestock onto trailers is trying to load an animal through an alleyway that is too wide. If the animal has the ability to turn around in the alleyway, it will most likely choose this route instead of the trailer. Adjustable alleyways set to the proper width can make loading a smoother process (Figs. 5-7 and 5-8). Remember that stress decreases production, so loading and unloading livestock should always be done calmly. Many drugs are not approved for use in food animals but may be desirable or necessary to use in certain situations. This is referred to as extralabel drug use. Withdrawal intervals are not printed on the labels of such drugs. In order to guide veterinarians on the extralabel use of drugs in food animal species, the Food Animal Residue Avoidance and Depletion Program (FARAD) is a convenient source of information. FARAD is the primary resource for recommendations for withdrawal times after extralabel drug use in food animals. It is a computer-based “decision support system” that provides current label information on withdrawal times of approved drugs, a database of scientific articles with data on drug residues and pharmacokinetics of nonapproved drugs, and official tolerances of drug and pesticide residues in meat, milk, and eggs. (FARAD may be contacted at www.farad.org or by phone at 1-888-USFARAD. FARAD is sponsored through the US Department of Agriculture [USDA]). Panel tags are commonly used as a form of ID in cattle, swine, sheep, and goats. The tags can be placed in the middle third of the ear and worn like an earring (Fig. 5-9). Individual producers use a variety of tag colors, sizes, and number/letter systems to identify each individual animal. No set numbering or lettering system is used in any species of livestock, so technicians should not assume that the way one producer uses a tag is the same way every other producer uses the tags. These tags can easily be removed if the animal is sold, and the animal can be retagged with a tag relevant to the new producer’s system (Fig. 5-10). Panel tags can easily be ripped out or removed, making it a temporary form of ID. Electronic ID tags are becoming more popular. The USDA is implementing the National Animal Identification System. This system will help animal health officials more effectively track animals during a disease outbreak and quickly find other animals that may be infected. The system will be put into place in three phases. The first phase is premises registration. The USDA is asking producers to register their farms and ranches as locations where livestock are raised. The second phase is animal identification. The electronic ID tags are placed in all livestock and stay with the animal until death (Fig. 5-11). The third stage of the system is an animal tracking database where information about the livestock will be stored. The system is in the beginning of implementation and is not fully underway. Metal clips are commonly used in cattle as a more secure form of ID. They are less likely to be ripped out than panel tags but are not as easy to read from a distance (Fig. 5-12). In order to read metal clips, the cattle must be restrained. These metal clips are also placed in heifers that have been vaccinated for brucellosis. Other livestock such as sheep and goats may also be identified using metal clips. Temporary marking paint is used in all of the large animal species. It is a waterproof paint similar to car paint that can be applied to the animal. It is a temporary form of ID that will rub off after time but is useful for heat detection, pregnancy checking, or identifying an individual or group of individuals for a short period of time (Fig. 5-16). Ear notching is a permanent form of ID that is commonly used in goats, horses, and pigs. Ear notching is done in cattle but not as a form of ID. Ear notching in cattle is used for collection of tissue in the testing for bovine viral diarrhea. The universal ear notching system is not the only system of ear notching utilized by producers. Technicians should get clarification about the type of system being used (Fig. 5-18). Heifers are commonly tattooed as part of the brucellosis vaccination. Other species that are commonly tattooed as a form of ID include goats and swine. Racehorses commonly have tattoos placed on the labial mucosa (inner lining) of the upper lip (Fig. 5-19). The tattoo is usually a combination of numbers and letters that identify the year of birth and the horse’s registration number. Lip tattoos are usually applied to racehorses when they enter race training, most often as 2-year-olds. Brands may be required by certain breed registries. Some producers have their own brands for ID of animals that belong to their farm or ranch. Often registries mandate the type, configuration, and location of the brand. However, any owner can brand an animal with a symbol of his or her choice wherever he or she prefers. Brands are usually placed on the side of the neck, over the triceps muscle on the forelimb, or on the hip/thigh area of the hindlimb. The two types of branding are freeze branding and hot branding (Fig. 5-20). Freeze branding destroys the hair pigment, which is derived from cells called melanocytes. Freeze branding uses branding irons dipped in liquid nitrogen. The iron is applied for a predetermined time necessary to kill the melanocytes but spares the follicle cells that grow the hair (Fig. 5-21). The hair eventually grows back white (no pigment) in several months (Fig. 5-22). Gray horses can be freeze branded, but the iron is applied longer to kill not only melanocytes but also the hair follicles so that hair does not regrow. The result is a bald brand. In horses, freeze brands can be placed high along the crest of the neck and may be obscured by the mane. Be sure to look beneath the mane for freeze brands and other markings. Hot branding is considered by some to be more painful than freeze branding, which numbs the nerves within seconds of application of the freeze branding iron. However, many people who have performed hot brand procedures maintain that the discomfort of the animal is minimal during the procedure and is comparable to that produced by freeze branding. The goal of hot branding is to kill the hair follicles, producing a hairless scar. Microchips can be placed in any large animal, but because of the cost associated with microchipping the only species in which they are commonly used is the horse. Microchips can be inserted subcutaneously in horses and are usually placed in the neck area (Fig. 5-23). Microchips are encoded for the individual horse and require a special sensor to scan the horse and read the ID code. This form of ID is gaining popularity in the horse world. In ruminants you may see use of rumen boluses that contain a microchip as a form of ID. Markings should be recorded for all livestock; however, markings are most useful in the horse. The six “markings” on domestic animals are the four legs, the head, and the tail. Markings are usually white and are described as such. In particular, white markings are the most distinguishing (Fig. 5-24A and B). Leg and face markings are often described subjectively; for example, what one person calls a “full sock” is a “low stocking” to another, and this may be problematic. There is no standard level at which a sock becomes a stocking, a coronet becomes a pastern, and so on. Similar confusion exists with facial markings (i.e., no standard landmarks for strictly defining strips, stripes, and blazes). To minimize confusion, it is preferable to either use a diagram to draw and label the markings (Fig. 5-25) or use a camera to photograph the animal for definitive ID. Drawings should be as accurate as possible; for example, stars are not always in a perfect diamond shape, although they are often drawn that way. Stars are usually irregular in shape; in addition, they may be located above, at, or below eye level. These details are important. Facial markings are often continuous; for example, a star may be continuous with a strip or stripe. When describing continuous facial markings, use a dash between the markings (e.g., star–strip, star–strip–snip). Photographs are especially useful for breeds with complicated coat patterns, such as Paint Horses, Appaloosas, and Pintos, which are difficult to draw accurately. A lack of markings on a leg or face is also be recorded for accuracy and to prevent fraudulent altering of medical records. Clearly indicate which body part lacks the markings and write “none” (e.g., left forelimb—none). Within a clinic it can be beneficial to communicate a standard description for each marking. Box 5-1 lists standard marking descriptions. Coat color should always be recorded, although it is not a highly individual feature (Fig. 5-26). Coat colors are not often distinguishing, especially among several breeds with little variation in coat color (e.g., most Standardbreds are bay). Each horse breed registry defines its own acceptable and unacceptable coat colors and patterns, and these definitions may not be in agreement with other breeds. Foals present another challenge because a foal’s coat color may be a different color from its eventual adult coat. The best example of this is the gray coat color; these horses usually are born black and lighten to gray with age, eventually progressing to what appears to be pure white. For purposes of patient ID, record the coat color at the time of admission, not the anticipated adult color. A brown horse with a dull red hue is called a sorrel. The only breed that recognizes this color is the American Quarter Horse Association (AQHA). Within the AQHA you must distinguish between a sorrel and a chestnut; the distinction is made on the brightness of the red coat. All other breeds of horses do not differentiate this color and just call the horse a chestnut (Fig. 5-30). A roan’s coat color is salt and pepper. One strand is white and the next strand is color. They are often red or blue and sometimes referred to as strawberry roan, red roan, or blue roan for the appropriate color. The head of the horse is solid in color and does not have the roan pattern (Fig. 5-36). Hair whorls are often used as a form of ID in horses. All horses have hair whorls (also known as swirls or cowlicks), which can be used for ID purposes (Fig. 5-37). Certain whorl locations are common to all horses, so whorls at these locations are not considered distinguishing features of an individual. Whorls on the flanks and over the trachea are common to all horses and seldom are helpful in definitive ID. However, some whorls occur at locations that are useful for ID. All horses have at least one whorl on the forehead between the eyes, but the whorl may be located above, below, or at the level of the eyes. The whorl may be right or left of midline and some horses may have two or even three whorls in this area. When properly recorded, the forehead whorls are useful. The other areas to check for distinguishing whorls are along the crest of the neck and along the jugular grooves. Do not assume that if there is a whorl on one side of the horse there will be a corresponding whorl on the other side. The standard written symbol for whorls is a simple “X” recorded on the horse’s diagram or photo. Chestnuts occur on the medial aspect of all limbs (Fig. 5-39). Chestnuts are the evolutionary remnants of the digital pad of the first digit. They are small (1–3 cm), ovoid raised areas of cornified tissue proximal to the carpus on the forelimbs and at the level of the tarsus on the hindlimbs. They are seldom useful for ID purposes.
Admissions, Medical Records, and Physical Examinations for Large Animals
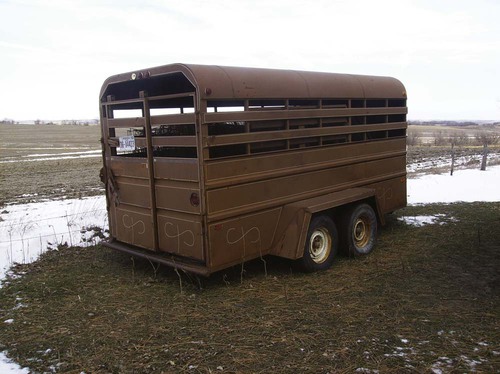
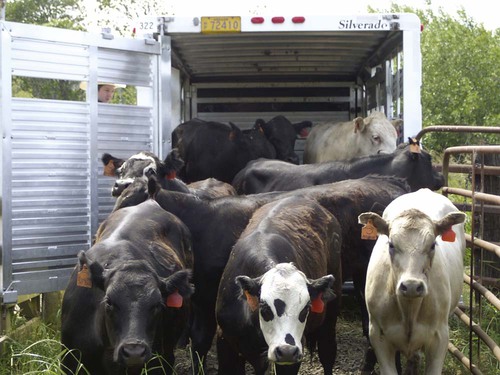
Loading and Unloading Livestock and Horses
Medical Records
Patient Identification
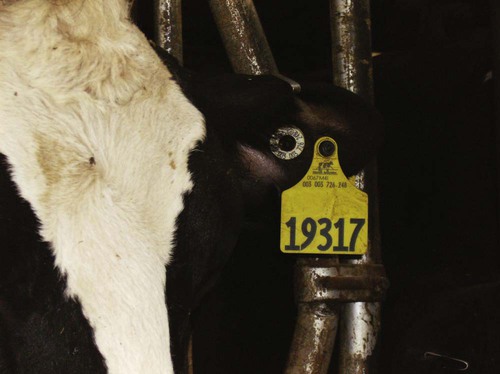
Panel Tags
Electronic Identification Tags
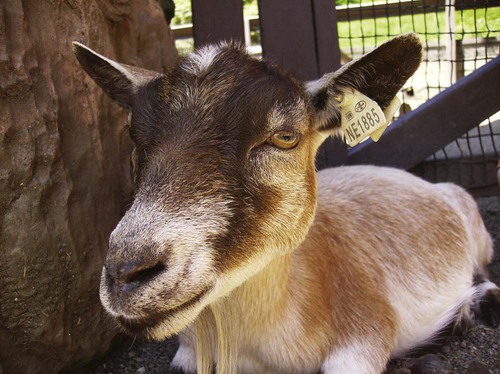
Metal Clips
Temporary Marking Paint
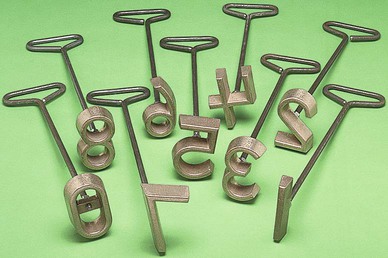
Ear Notching
Tattoos
Hot Brands and Freeze Brands
Microchips
Markings
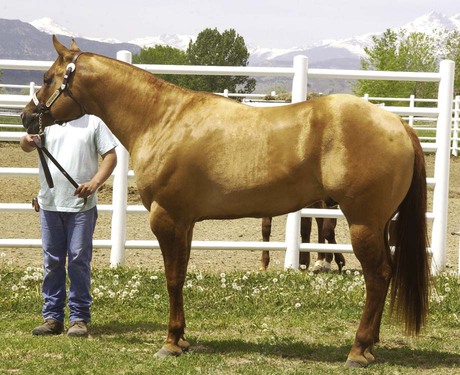
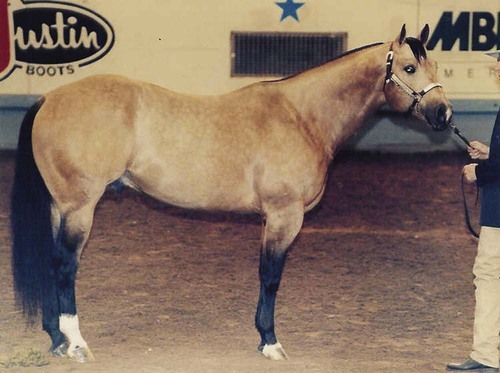
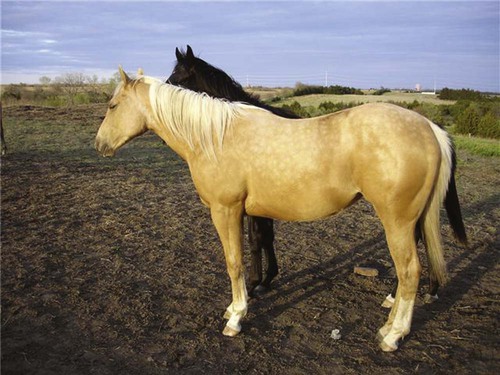
Coat Color
Sorrel
Roan
Hair Whorls
Chestnuts
Admissions, Medical Records, and Physical Examinations for Large Animals