Ventilation mode
Pressure control mode
Ventilation pressure (P max )
18 mbar
Positive end expiratory pressure (PEEP)
2–4 mbar
Single inspiration time
0.4 s
Singe expiration time
0.8 s
Ventilation frequency (f)
50/min
Flow (l/min)
1.5 l/min
Oxygen concentration (FIO 2 )
0.7
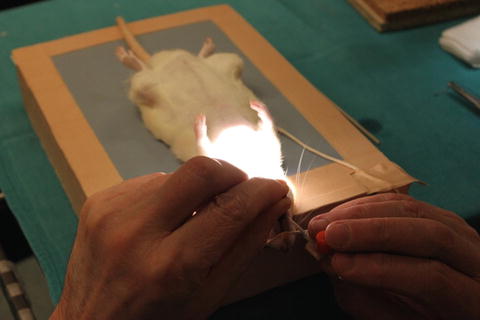
Fig. 10.1
Small animal ventilator (Biegler Medizin Elektronik)

Fig. 10.2
Intubation of a Fischer Rat with a 14G catheter
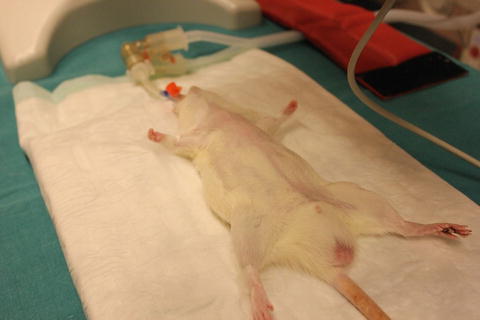
Fig. 10.3
Donor animal, supine position to allow midline sternotomy
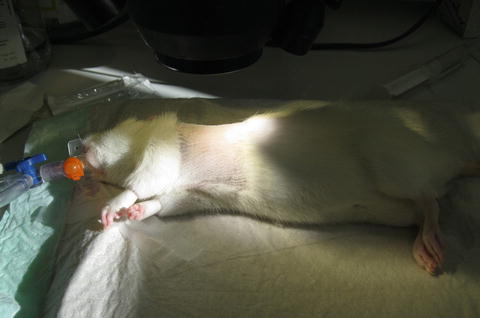
Fig. 10.4
Recipient animal is placed in a lateral position
10.2.3 Tips and Tricks
1.
Over flexion of the rat head is essential to allow for direct vision of the glottis
2.
Use a local anesthetic (xylocaine spray) to overcome gag reflex when inserting the tube
3.
When applying the local anesthetic, use a Q-tip to swab the inside of the rat ’s mouth for better results
4.
Trans illumination of the rat neck markedly facilitates intubation
5.
It is essential to avoid repeated tries of intubation. This could trigger swelling of the airways and is associated poor survival
6.
Do not apply any force when inserting the intubation tube; it should come in fairly easily if in the correct position
7.
The ventilation management presented in the Table 10.1 has been extensively tested and is associated with favorable outcome
8.
It is strongly recommended to use an isoflurane induction box for induction of anesthesia prior to application of i.p. general anesthesia if the surgeon is not experienced in animal care and management
9.
Using a supine position for the harvesting procedure and a right lateral position for subsequent implantation procedure guarantees excellent organ exposure and facilitates the procedure
10.3 Lung Graft Procurement
10.3.1 General Aspects and Lung Anatomy
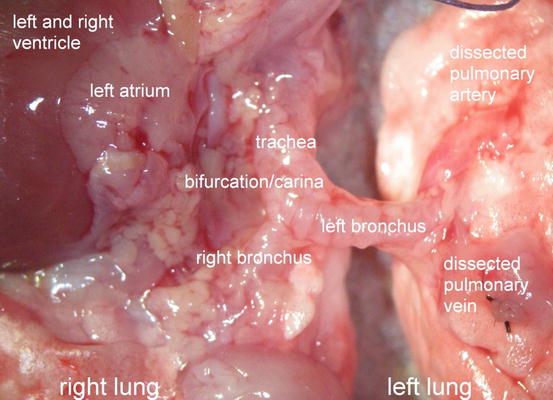
The left lung is selected for transplantation because the lungs of the rat consist of one whole lung in the left hemithorax and four smaller lobes on the right side. Figure 10.5 schematically illustrates the thoracic anatomy in rats . Transplantation of four small lobes into the right hemithorax with complete bronchiovascular anastomoses is technically not feasible, especially not in a timely fashion to guarantee high recovery rates from anesthesia and excellent animal survival. However, transplantation of a left lung into the right side and replacing the four right lobes is surgically feasibly due to the relatively long hilar bronchovascular structures. Thus, preference is given to a left orthotopic transplantation protocol in order to keep a physiologic model.
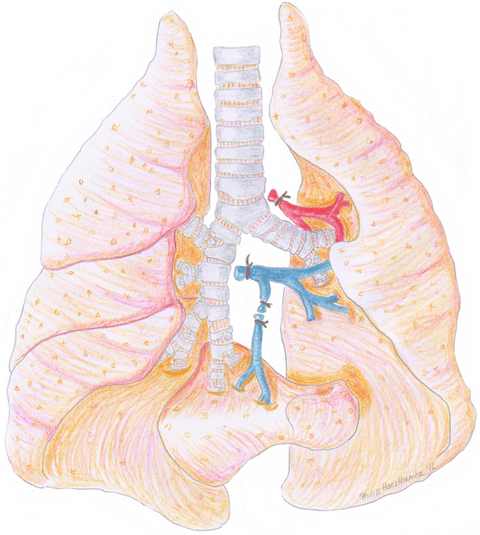
Fig. 10.5
Schematic illustration of the thoracic anatomy in rats . In the middle trachea, left and right main bronchus. On the right side, upper lobe, middle lobe, inferior lobe and postcaval lobe. Left lung and bronchovascular structures to the left side. Note: The postcaval segment functionally belongs to the right side, however, venous drainage is achieved via the left main pulmonary vein. Ligated vein of the right postcaval lobe to increase length of the left main pulmonary vein in order to facilitate venous anastomotic procedure
10.3.2 Harvesting Procedure and Graft Preservation
As harvesting and dissection of the left bronchovascular structures is an extensive procedure and takes considerable time, we recommend doing both steps before opening the recipient animal. The recipient thoracotomy with exposure of both heart and left lung is probably the most extensive procedure that can be performed in a rat and should be done as fast as possible. As a consequence, perfect timing is essential.
10.3.2.1 Equipment and Material
Binocular operating microscope, small animal ventilator, 2 micro forceps, various larger forceps, 1 micro scissor, 1 large scissor, skin retractor, 7-0 silk suture cut to loops and ligatures, 1 20 ml syringe for perfusion solution, 1 5 ml syringe for heparin solution, 1 1 ml syringe for general anesthesia, 1 petri dish.
10.3.2.2 Procedure
1.
Position the donor animal for median sternotomy. Shave the anterior thorax and abdomen and clean the incision sites with a 75 % alcohol solution.
2.
Do a median skin incision reaching from the jugular notch to the pubic symphysis and extend the skin incision laterally from a mid-abdominal level to a T-shaped incision with subsequent cutting of subcutaneous tissue and anterior abdominal musculature.
3.
Incise the peritoneum from the xiphoid to the pubic symphysis and, following the original T-shaped skin incision, extend the peritoneal incision laterally to both sides.
4.
To allow for direct vision of the big ascending and descending retroperitoneal vessels, evert the abdominal viscera extraperitoneally.
5.
Dissect the abdominal aorta and inferior vena cava and separate both between the inferior margin of the liver and the tributary renal vessels.
6.
Cannulate the infrahepatic inferior vena cava using a 27G needle (27G x″ – Nr. 20, 0.4 mm × 19 mm, BD MircrolanceTM 3) and heparinize the donor animal systemically using 5,000 U Heparin.
7.
Following anticoagulation, remove the thoracic diaphragm from its costal attachments and the tripartite of thoracic organs (consisting of heart as well as left and right lung) until it becomes visible.
8.
Discontinue artificial ventilation intermittently to allow easy separation of the thymus and pericardial tissue from the posterior sternal wall as well as dissection of the inferior pulmonary ligaments.
9.
Do a median sternotomy using conventional scissors. Apply conventional needle holders on each side of the transected sternum spreading apart the chest walls.
10.
To properly observe the large central thoracic vessels and to allow separation of the ascending thoracic aorta from the pulmonary trunk, excise the thymus.
11.
Cut the left atrial auricle to later allow drainage of the perfusion solution. As the left atrial auricle is cut, the donor rat starts to exsanguinate and ischemia time is initiated.
12.
Next, fill the thoracic cavity with ice to accelerate cardiac arrest.
13.
Place wet gauzes on the abdominal viscera to avoid dislocation of the intestines into the thoracic cavity.
14.
Insert a 21G needle (21G × 1 1/2″ – Nr. 2, 0.8 mm × 40 mm, BD MircrolanceTM 3) into the pulmonary trunk via subvalvular myocard and pulmonary valve and perfuse the lungs with 20 ml of an anterograde cold preservation fluid of low potassium dextran glucose (LPDG) (Perfadex®) with 20 μl/20 ml of sodium bicarbonate (Fig. 10.6).
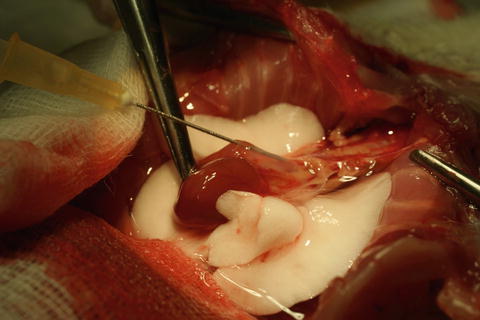
Fig. 10.6
Thoracic cavity in situ, cannulation of pulmonary trunk with 21G needle and perfusion of both lungs. Heart in the middle, aorta, supra-aortic trunks and pulmonary artery. To both sides perfused left and right lungs
15.
When the perfusion of the lungs is homogenous, extend the original median incision cranially to the level of the larynx.
16.
Divide the infrahyoid muscles medially and ligate the trachea with the lungs fully inflated at 100 % of total lung capacity.
17.
Cut the trachea proximal to the ligature while keeping the lungs fully inflated.
18.
Excise the cardiopulmonary block by cutting the supra-aortic trunks consisting of brachiocephalic trunk, right common carotid artery and right subclavian artery and by transecting the thoracic aorta, superior vena cava, inferior vena cava and pulmonary ligaments.
19.
Place the explanted cardiopulmonary block (Fig. 10.7) in a Petri dish with crushed ice and cooled, wet gauze.
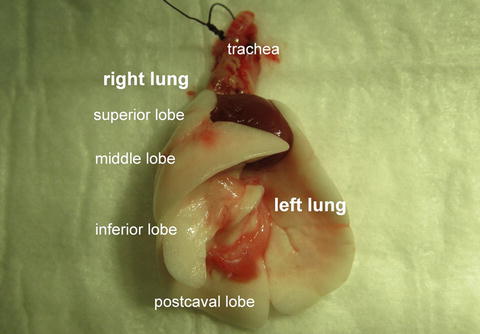
Fig. 10.7
Explanted cardiopulmonary block
10.3.2.3 Tips and Tricks
1.
As with every surgical intervention, we recommend to prepare everything in advance, especially ligatures, loops, cuffs and preservation fluids.
2.
Cut the ligatures to 2 cm and the loops to 3 cm
3.
When doing the sternotomy, it is important to avoid broken ribs and loose bony fragments in order not to stab or injure the lungs
4.
When flushing the lungs, do not apply any pressure on the syringe. This would damage the alveolo-endothelial interface of the lungs and trigger a pulmonary edema. We recommend using gravity flushing instead of it
5.
The process of flushing takes about 5 min for 20 ml
6.
It is recommended to cool the lungs with crushed ice from the moment of cardiac arrest is initiated
10.4 Left Lung Dissection
10.4.1 Procedure
1.
Remove the remnants of the left inferior pulmonary ligament spanning between the left pulmonary vein and the right inferior pulmonary margin.
2.
The first structure to dissect is the left pulmonary vein owing to its most anterior position. In our studies, we found that Fischer rats in particular are not prone to anomalies in the hilar region and we constantly observed two segmental veins, a left superior pulmonary vein crossing the left main bronchus on its anterior aspect and a left inferior pulmonary vein. Both branches are tributaries of the left main pulmonary vein close to the hilus forming a comparatively long venous trunk (Fig. 10.8). In contrast to human anatomy, the left venous pulmonary system also drains the right postcaval lobe.
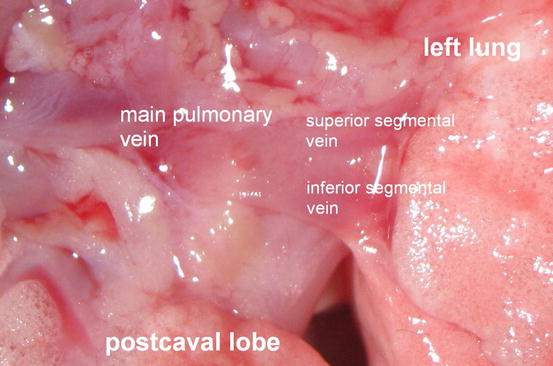
Fig. 10.8
Left main pulmonary vein with tributary segmental veins in Fischer Rats
3.
To gain additional vessel length, ligate and transect the right inferior pulmonary vein draining the right postcaval lobe. By cutting the left main pulmonary vein medial to the ligated venous branch and closing the left atrium, a long donor left pulmonary vein is created.
4.
Mobilize the artery carefully and dissect the artery from the pulmonary trunk to the hilus of the left lung. We have consistently observed a ligamentous fixation of the pulmonary artery on the distal left main bronchus. To facilitate the subsequent process of implantation and to gain a maximum of vessel length, we recommend transecting the ligament and cutting the artery as close to its origins as possible (Figs. 10.9 and 10.10).
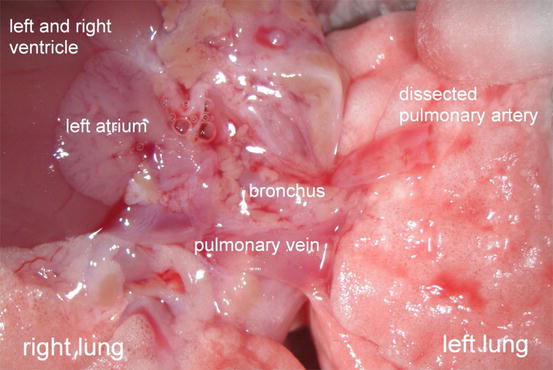
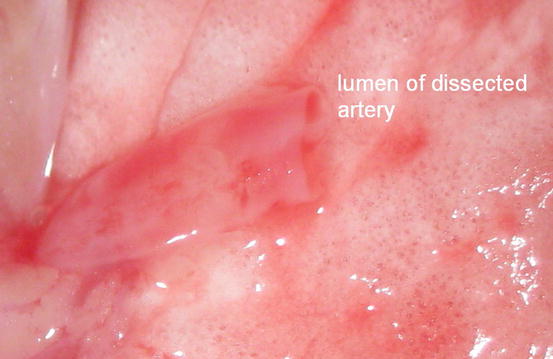
Fig. 10.9
Cardiopulmonary block with dissected and transected left pulmonary artery
Fig. 10.10
Dissected left pulmonary artery
5.
Flush both vessels with 500 U of Heparin to prevent local thrombus formation.
6.
7.
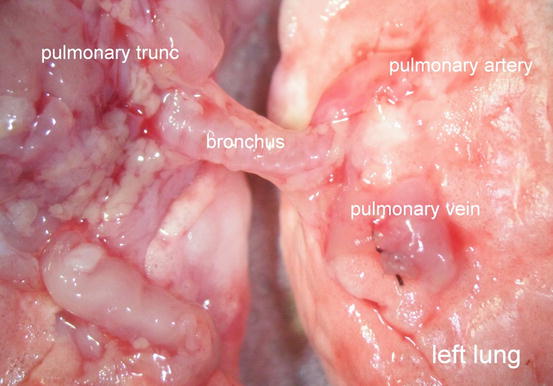
Remove the peribronchial tissue, which mainly consists of fat. Otherwise, clear vision of the bronchial lumen is difficult to gain during anastomosis and suturing of the airway anastomosis is impeded.
8.
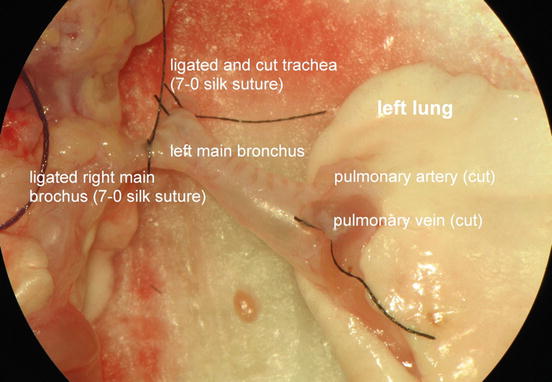
Undertake efforts to keep the lungs fully inflated for as long as possible as very high positive end-expiratory pressure (PEEP) is necessary to remove atelectasis of a fully collapsed transplanted allografted lung. Thus dissect, ligate and cut both trachea and right main bronchus distally. Utilizing this modification, the left lung remains fully inflated until initiation of the bronchial anastomosis .
9.
Figure 10.13 shows the entirely dissected left donor lung and displays the tripartite of bronchovascular structures consisting of a T-shaped left main bronchus with a ligated trachea and a ligated right main bronchus, a pulmonary artery and a pulmonary vein.