Chapter 9 Orthodontics
The word orthodontics often is equated with unethical veterinary practices. Certainly, orthodontic manipulation can be used for unethical purposes. However, orthodontic treatment should not be performed to deceive show judges, prospective owners, or buyers of offspring. The veterinarian who performs the procedures should not, inadvertently, become part of a treatment that will result in a deceptive act. The goal is to provide the patient with a pain free, functional bite. Regaining normal, cosmetic occlusion may be the end result of the treatment and is in itself not the result of unprofessional treatment. It is what the owner does with the animal that has had its heritable anatomy altered that determines the ethical or unethical behavior.
OCCLUSAL EVALUATION


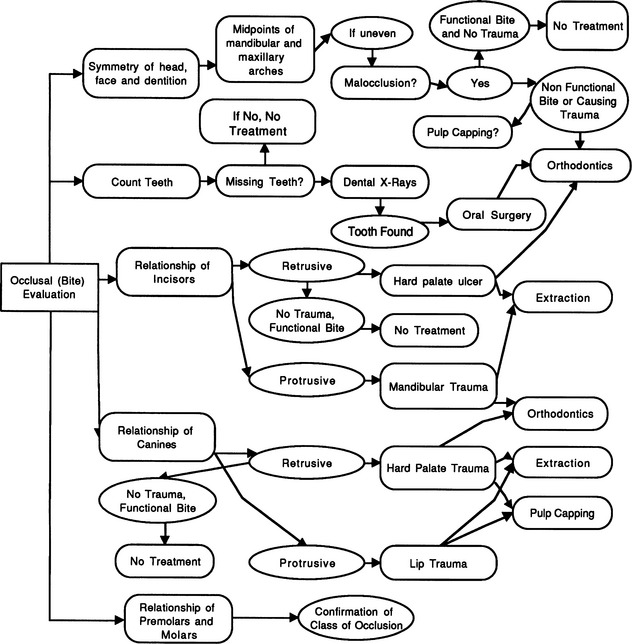
Classes of Occlusion
Normal
Abnormal Occlusion
Class 1
Class 2
Class 3
Unclassified
Orthodontic Fundamentals
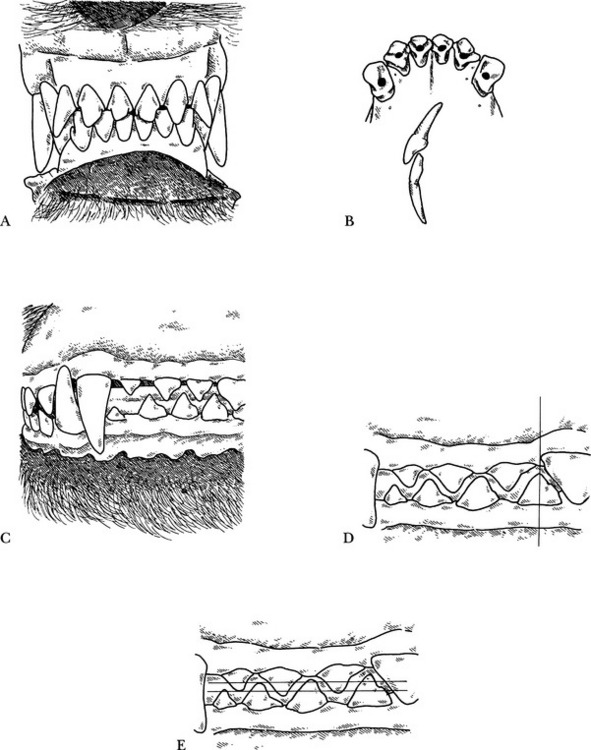
Tipping: one part of the tooth moves a greater distance and direction than another (Fig. 9-3, A) (requires light force).
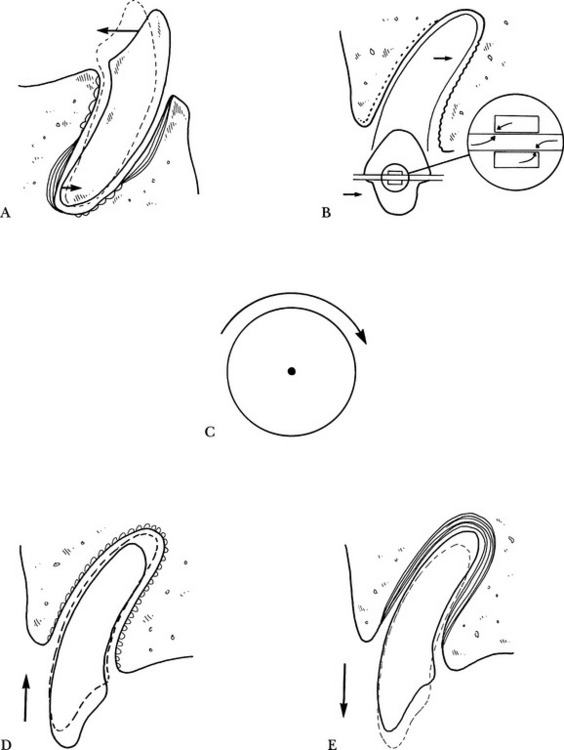
Translation or bodily movement: all parts of the tooth move the same distance in the same direction in the same amount of time (Fig. 9-3, B) (requires twice the force of tipping).
Rotation: tooth is rotated around its axis (Fig. 9-3, C) (requires light force).
Intrusion: tooth is moved into the alveolus (Fig. 9-3, D) (requires the greatest amount of force).
Extrusion: tooth is moved out of the alveolus (Fig. 9-3, E) (requires the least amount of force).
Continuous: force gradually diminishes (but does not reach zero) between adjustments.
Interrupted: force is reduced to zero between adjustments.
GENERAL ORTHODONTIC TECHNIQUES
Making an Impression Tray
General Comment
Technique
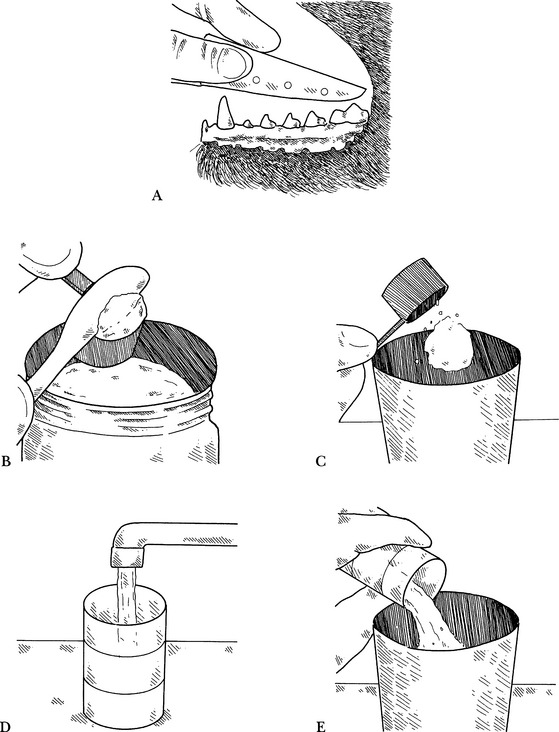
Creating the Impression
General Comments
Materials
Technique

Complications
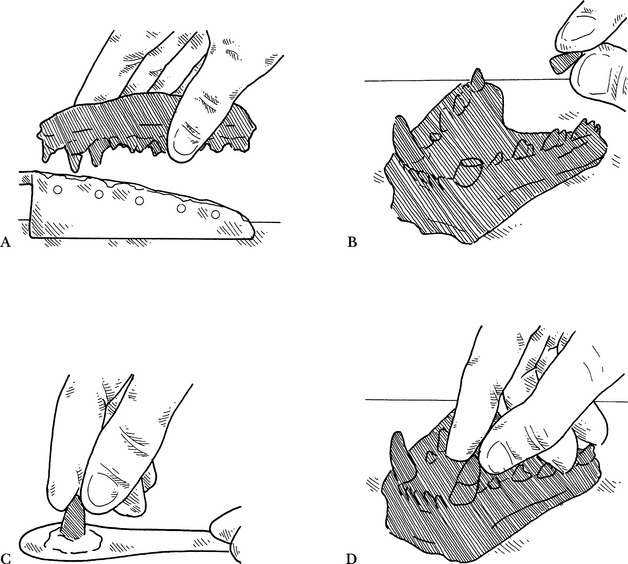
Making a Model
Indications
Materials
Technique

Complications
Incorrect Mix Ratios
Air Bubbles
Desiccation of the Alginate
Fracturing of Crowns on Model Teeth
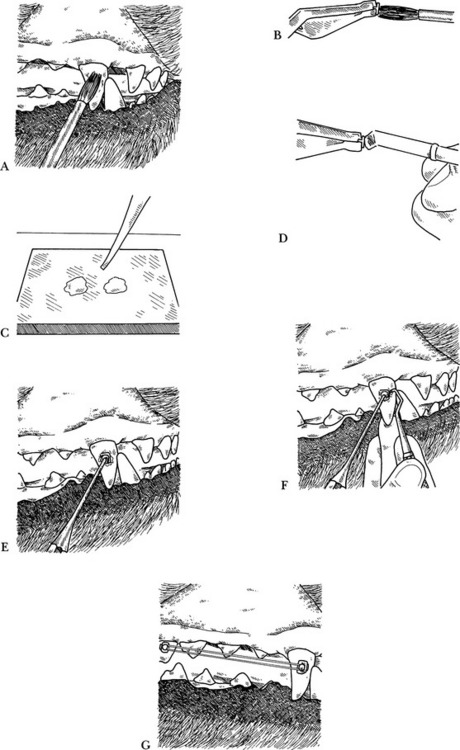
Direct Bonding of Bands, Brackets, and Buttons
General Comments
Materials
Technique
Complications
Brackets or Buttons Come Off Later
Discoloration of Tooth When Brackets Are Removed
Removing Buttons and Brackets
ORTHODONTIC APPLIANCES
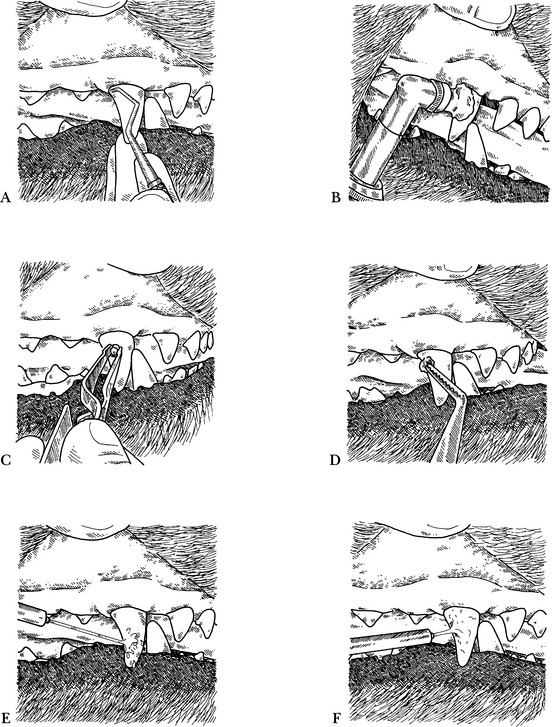
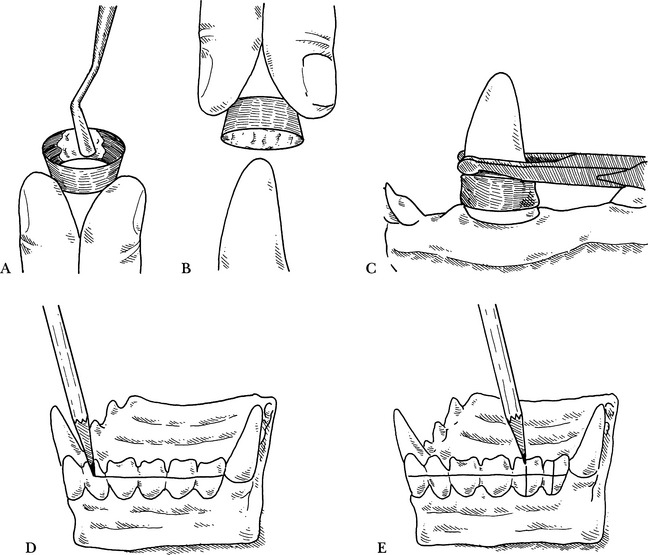
Making Bands
General Comments
Materials
Technique
Removing Bands
Stay updated, free articles. Join our Telegram channel

Full access? Get Clinical Tree


