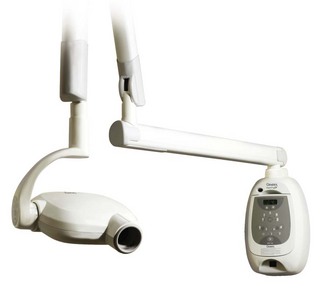
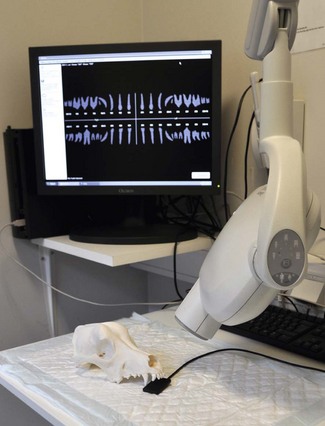
Chapter 7 Pathologic radiographic changes are usually discrete and therefore clarity and detail are essential. For a dental radiograph to be diagnostic, it should be an accurate representation of the size and shape of the tooth without superimposition of adjacent structures (Figs 7.1, 7.2). Intraoral radiographic techniques are therefore required – a parallel technique for the mandibular premolars and molars, and a bisecting angle technique for all other teeth. Contralateral (same teeth, opposite side) views should be taken as routine. Fig. 7.1 A non-diagnostic view Fig. 7.2 A diagnostic view Dental radiographs can be taken using conventional (film) or digital (digital sensors) methods. Digital radiography refers to computer-generated images of radiographs. In indirect digital systems the exposure is made on a photostimulatable phosphor plate (Fig. 7.3), rather than on a dental film. The latent image from the plate is then transferred to a computer. Direct-to-digital equipment uses a sensor (Fig. 7.4) as a data input device that sends the image directly to the computer. Most modern X-ray machines are compatible with most digital software and hardware packages. Older X-ray machines may not be capable of short enough exposure times (as low as 0.02 s for small patients). Fig. 7.3 Indirect digital radiography Fig. 7.4 Direct digital radiography • Provides immediate/rapid image availability • Eliminates the need for developing and fixing • Eliminates errors associated with developing and fixing • Eliminates film mounting and storage issues • Allows digital enhancement to assist visualization: Ideally a dental X-ray machine should be installed in the designated dental theatre (Fig. 7.5). They are available as wall mounted or free-standing units. These machines are cost-effective and their outlay is rapidly recouped. They usually have a fixed potential of 50–70 kV and a fixed tube current of 8–10 mA. Electronic timers are used to set the desired exposure time. Modern dental X-ray machines are capable of exposures as low as 0.02 s, which is required for digital radiography. Do remember to ensure that the X-ray machine is compatible with the digital system you purchase. Single emulsion, non-screen or screen film can be used to take dental radiographs. To allow intraoral film placement and achieve high definition, dental film should be used. Dental film is single emulsion, non-screen, and is available in three sizes (Fig. 7.6): occlusal, periapical and pediatric. The dental film is packed in either a paper or a plastic envelope and the film is flanked by black paper and backed by a thin lead sheet (foil) that reduces scattered radiation. Fig. 7.6 Sizes of dental film In indirect digital systems the conventional film is replaced by a photostimulatable phosphor plate (Fig. 7.3). The plate is exposed and the latent image is transferred to a computer. The plates come in three sizes equivalent to dental film sizes. The plates are reusable in that the latent image can be cleared by placing them in light, e.g. against a viewing box. In direct digital systems, the conventional film is replaced by a sensor that sends the X-ray image directly to the computer (Figs 7.4, 7.7). In my opinion, this is the easiest and most cost-efficient method of obtaining radiographs. The sensors are available in two sizes, equivalent to periapical and pediatric film. The occlusal size is not available. In my experience, the size 2 sensor is the only one needed for dogs and cats. The smaller, size 1 sensor may be useful in cats and small exotics.
Dental radiography
Introduction
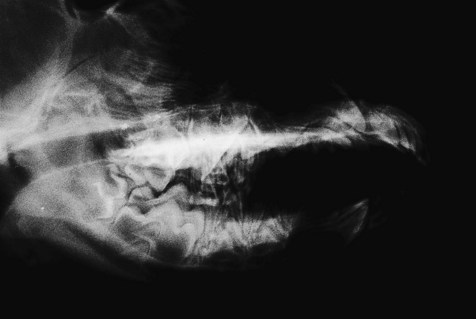
This lateral view (extraoral film positioning) is non-diagnostic for evaluation of teeth and associated tissues. There is superimposition of the right and left sides. In fact, it is not possible to say much more than that it is a radiograph of an immature dog and there are teeth present.
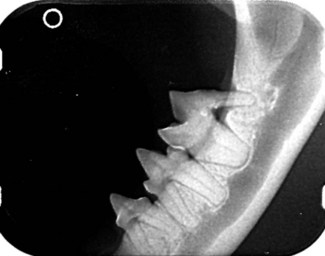
For a dental radiograph to be diagnostic, it should be an accurate representation of the size and shape of the tooth without superimposition of adjacent structures. Intraoral placement of dental film and parallel technique gives an accurate representation of the mandibular 3rd and 4th premolars and the 1st molar, as well as detail of the mandibular bone, in a cat. The mesial surface of the 3rd premolar is not on the film and a second view with the film placed further rostrally in the mouth is required to assess this tooth fully. In this view, the component structures of the tooth and its supporting tissues are well defined. The enamel is seen as an incompletely visualized radiodense band that covers the crown and tapers to a fine edge at the cervical margin of the tooth. The dentine is less radiodense than enamel and accounts for the bulk of the hard tissues of the tooth. The cementum is not visible. The pulp cavity is the continuous radiolucent space in the center of the tooth which extends from the coronal portion to the apex of the roots. The wall of the alveolar tooth socket (the lamina dura) is the radiodense line which runs parallel to the root of the tooth. The periodontal ligament space is the fine radiolucent line between the lamina dura and the root of the tooth. The cortical bone on the crest of the alveolar ridge is continuous with the lamina dura. The mandibular canal is clearly visible. The horizontal bone loss affecting the distal root of the molar is obvious.
Equipment and materials (Box 7.1)
In indirect digital systems, the exposure is made on a photostimulatable phosphor plate rather than on a dental film. The latent image from the plate is then transferred to a computer.
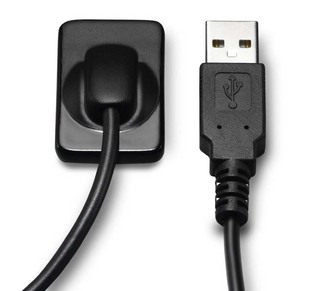
In direct digital systems, a sensor is used instead of a dental film. The sensor sends the image directly to the computer.
The X-ray unit
X-ray film
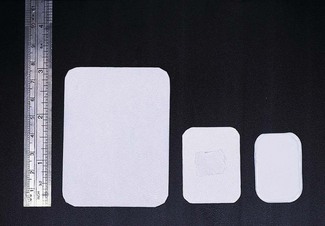
Dental film is available in three sizes: occlusal (5 × 7 cm), periapical (3 × 4 cm) and pediatric (2 × 3 cm). The smallest film that depicts the area of interest should be used to facilitate film positioning in the mouth.
Digital systems
![]()
Stay updated, free articles. Join our Telegram channel

Full access? Get Clinical Tree


Dental radiography